You are cordially invited to visit with me at the Brickbottom Artists Open Studios event, this weekend, November 23 and 24, 12-5 PM each day.
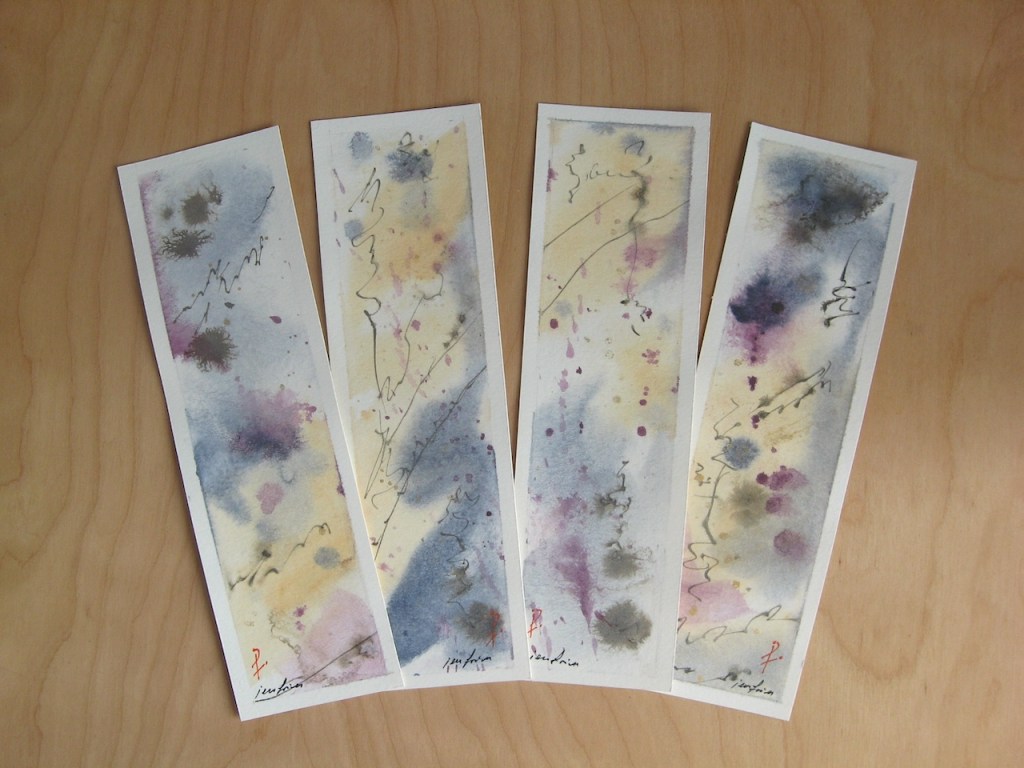
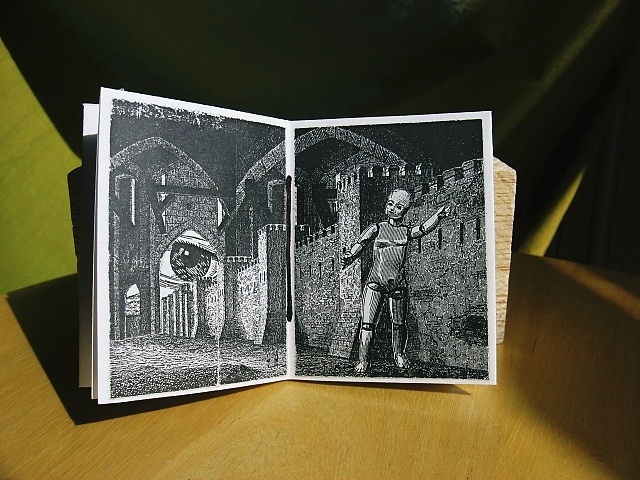
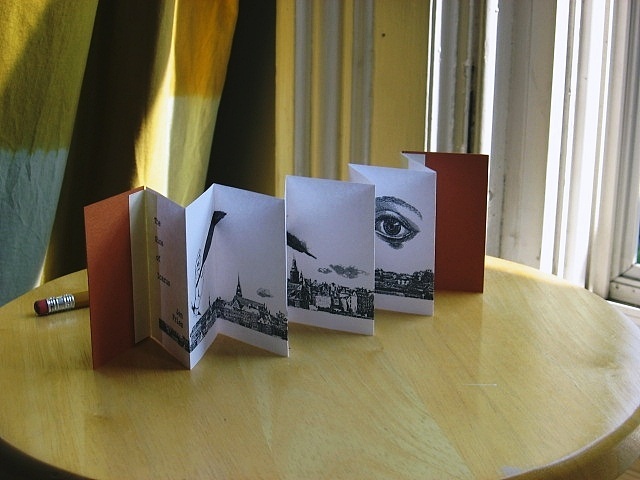
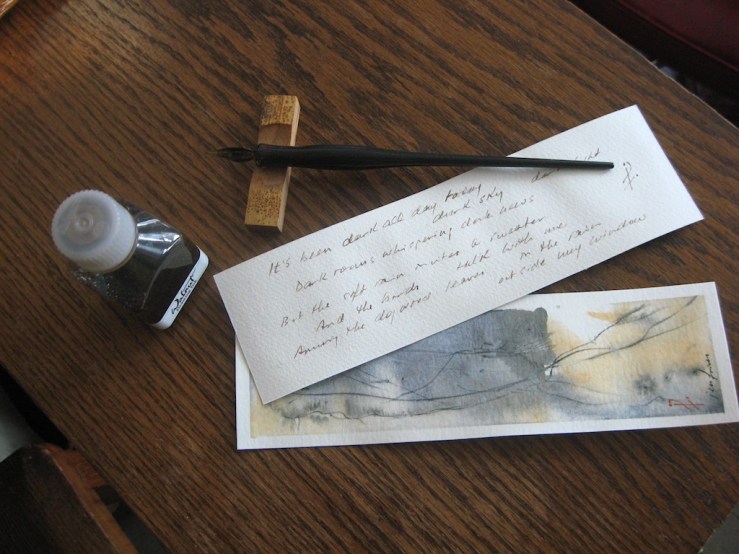
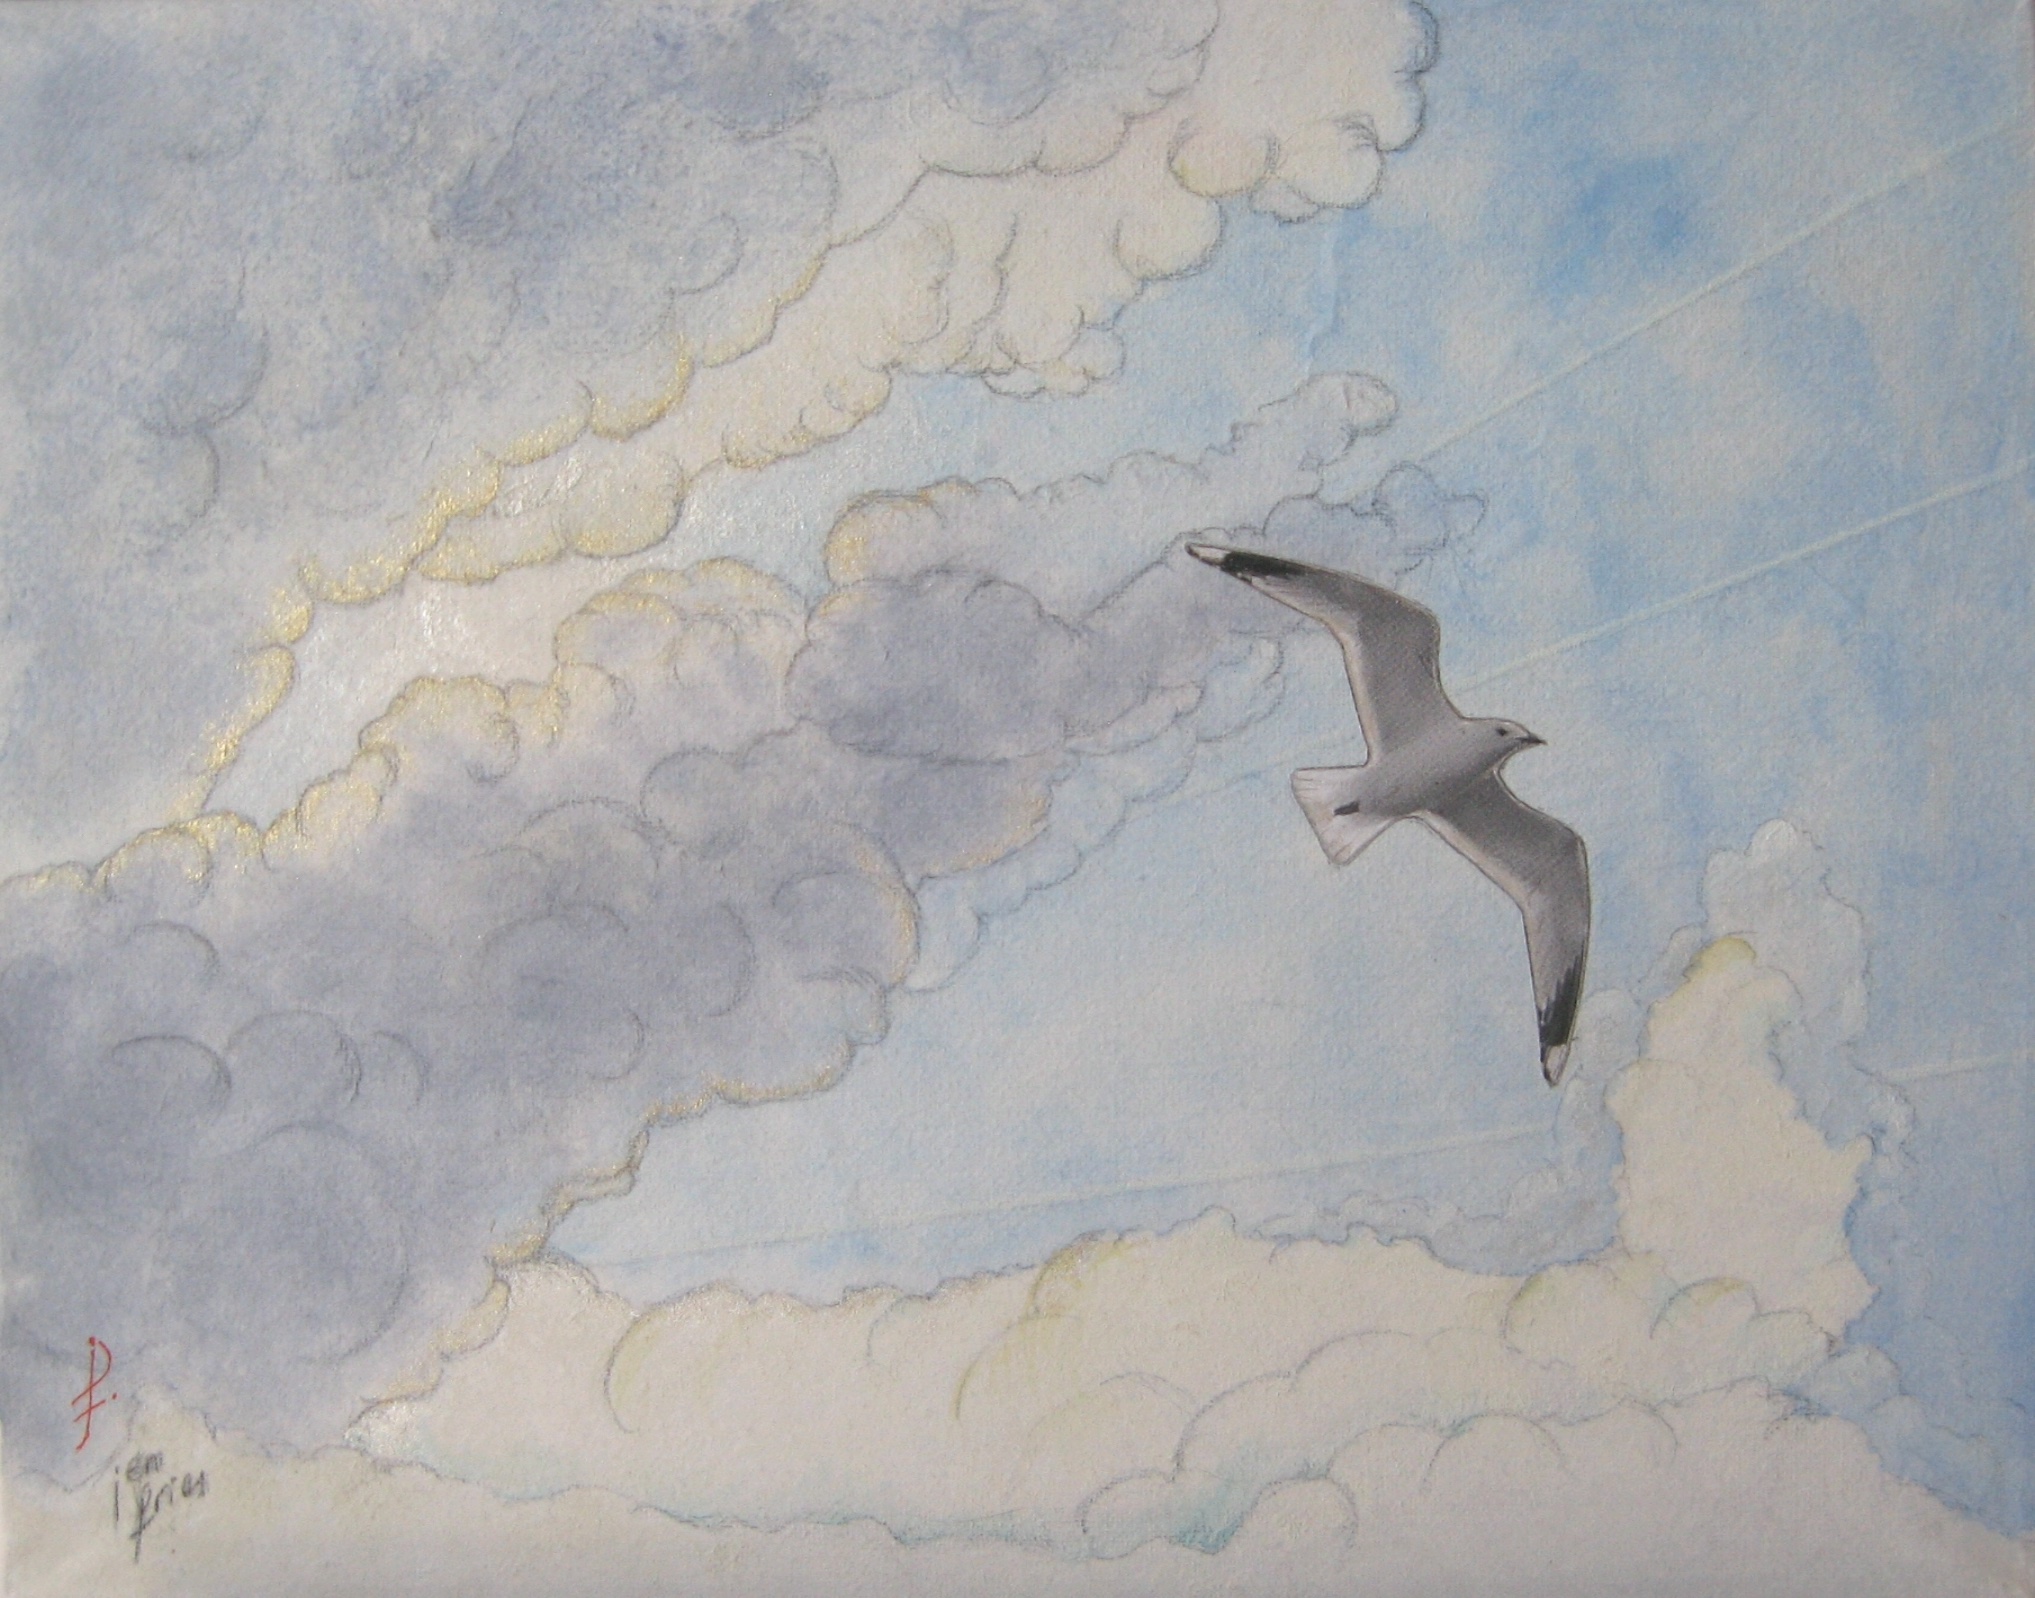
Yes, I’m actually coming out of my house! I’ve been doing so much work that I decided to make one of my rare public appearances to show it off and tell people all about it. I’ll be displaying medium and small works on canvas, small works on paper, journaling/note cards, and tiny micro-zines, and I’ll be happy to answer questions and engage in sociable chit-chat.
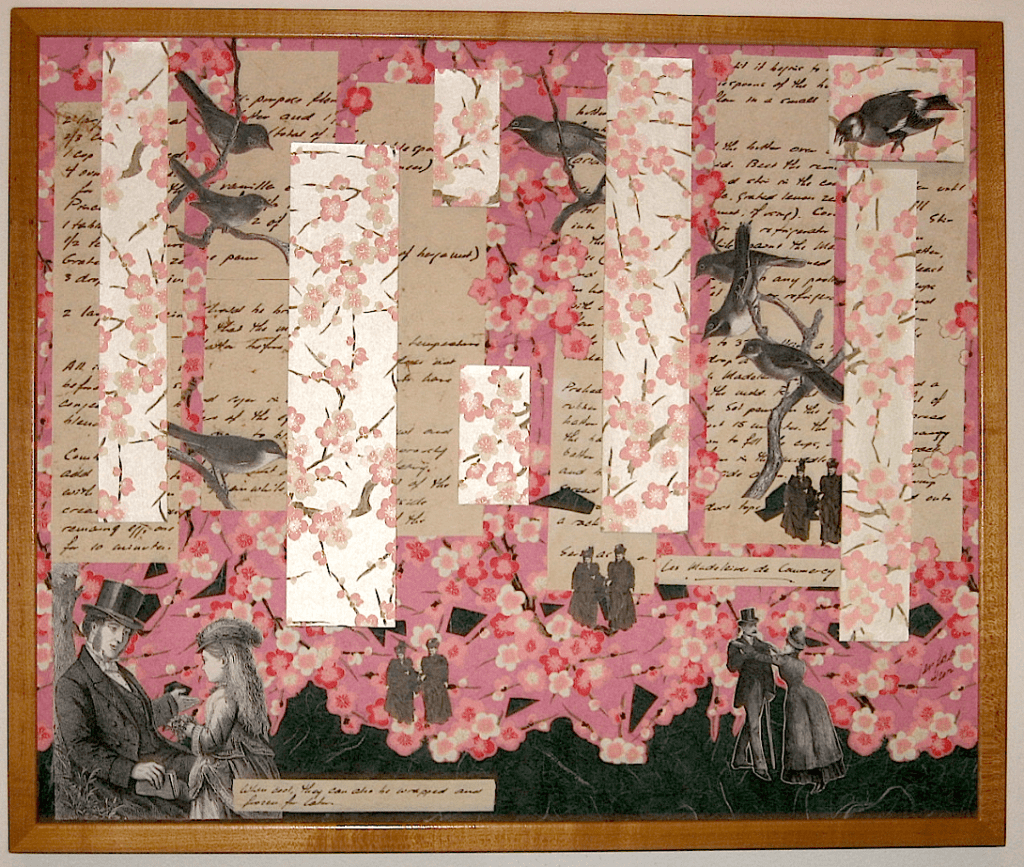
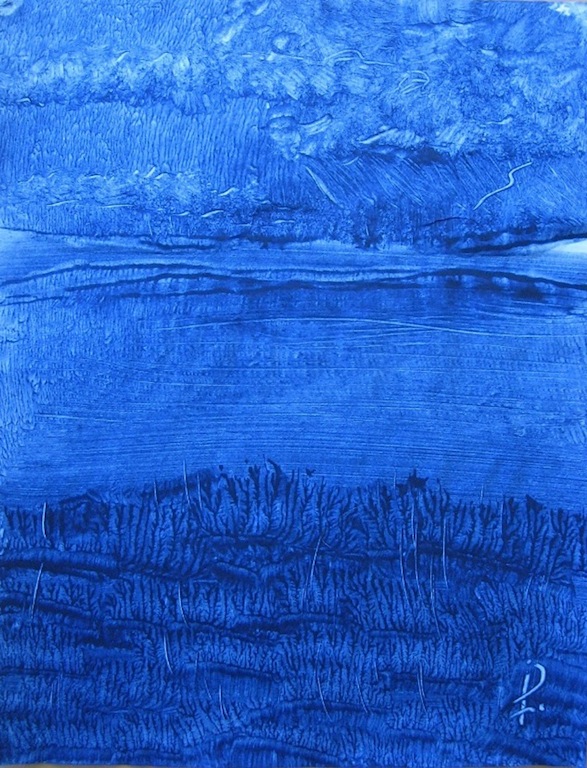
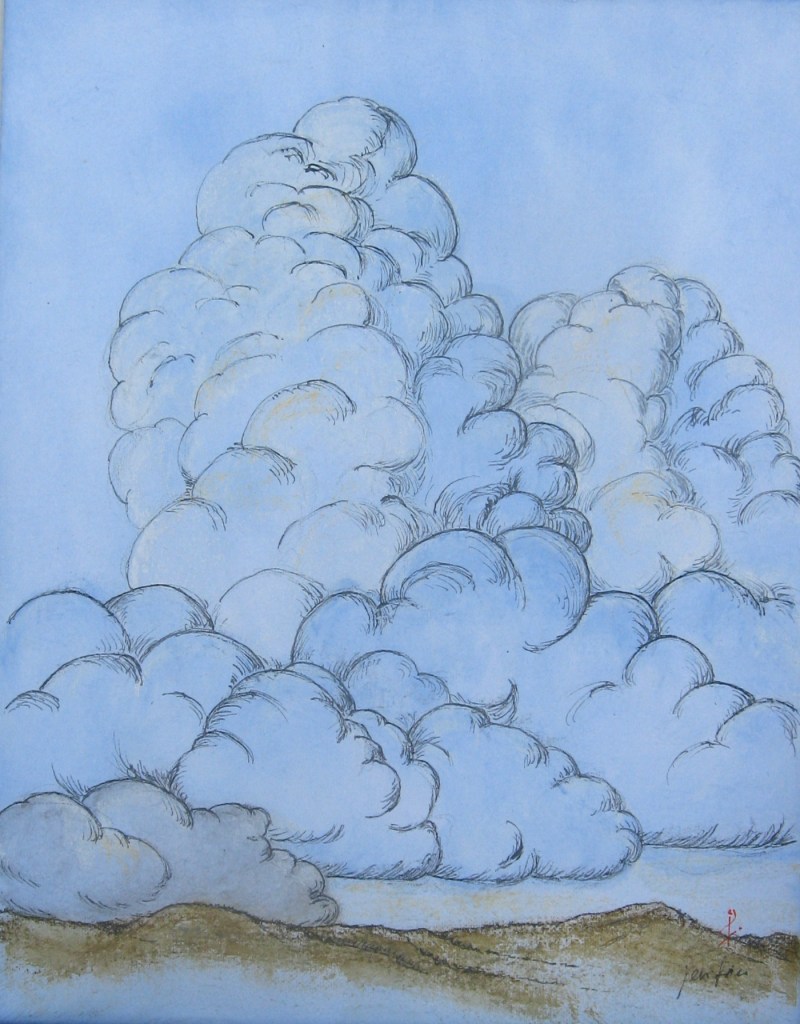
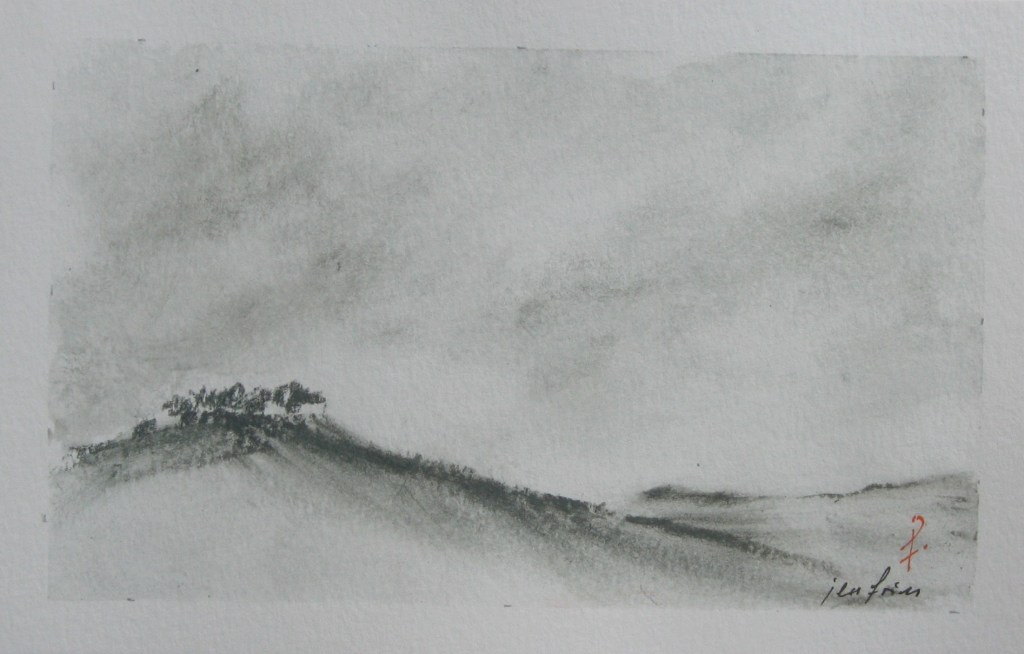
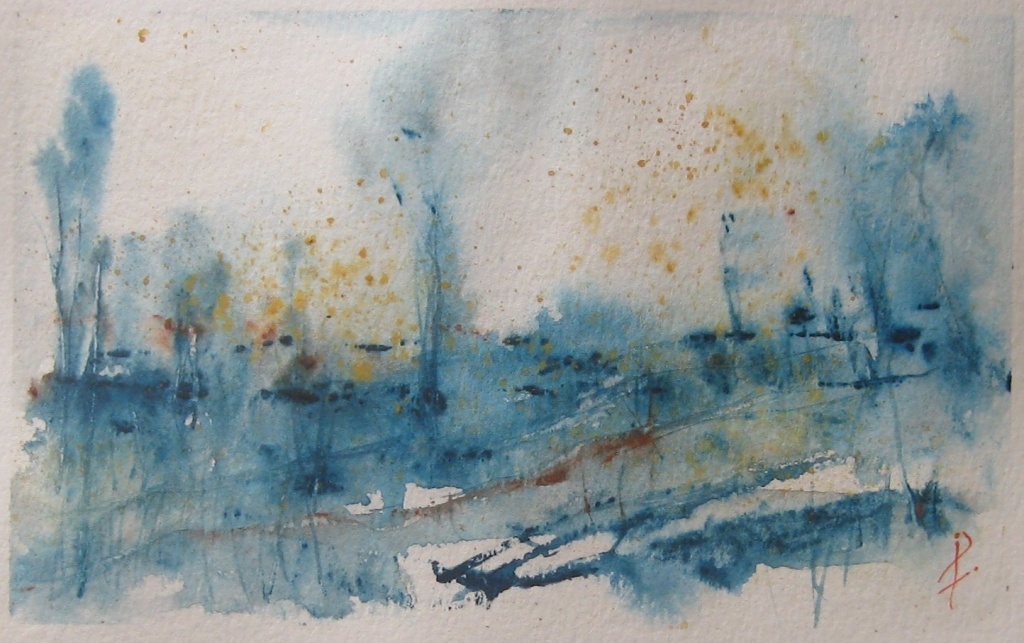
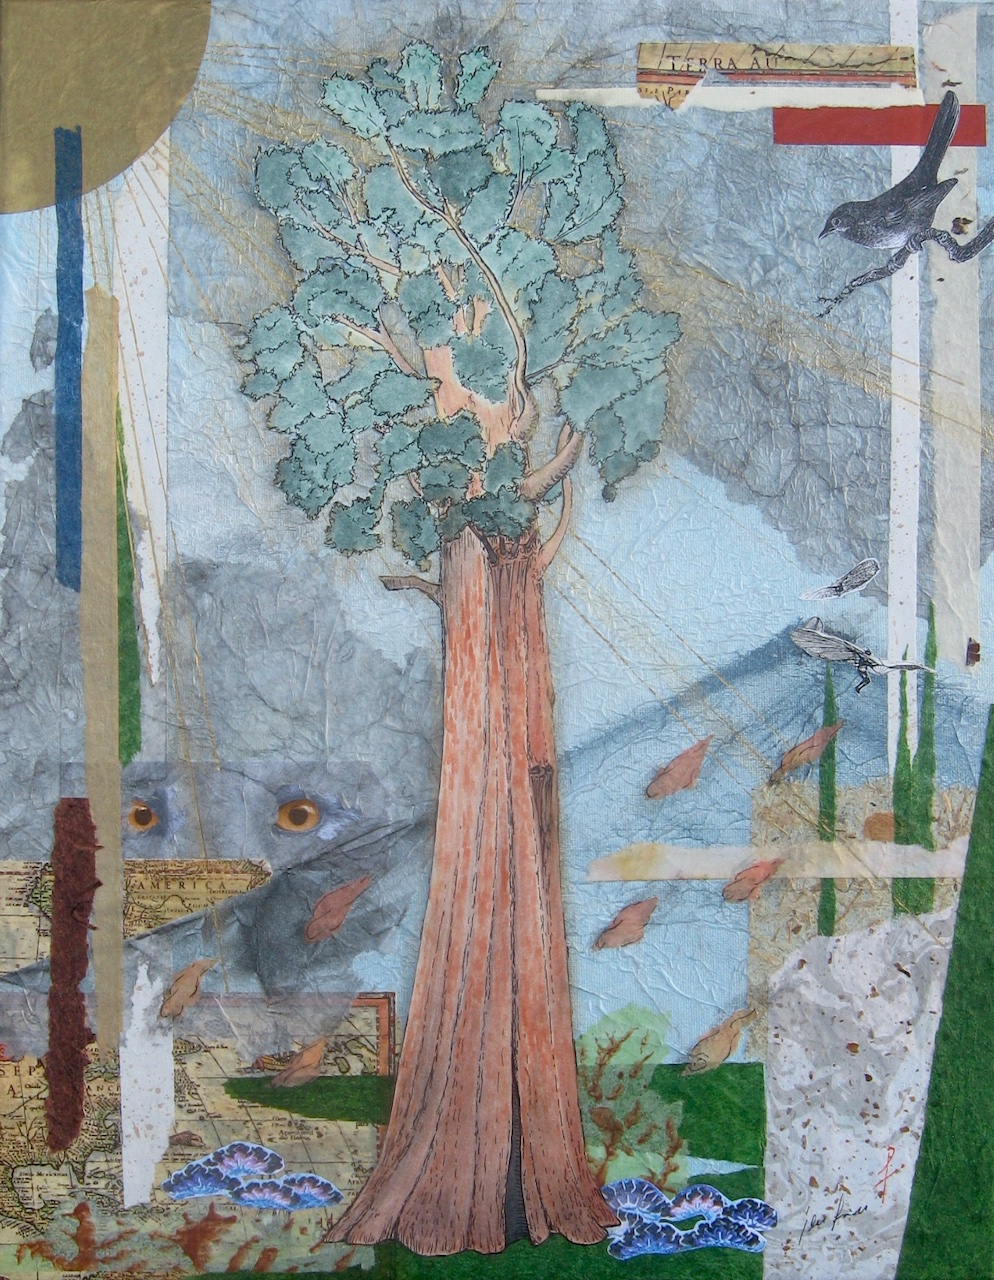
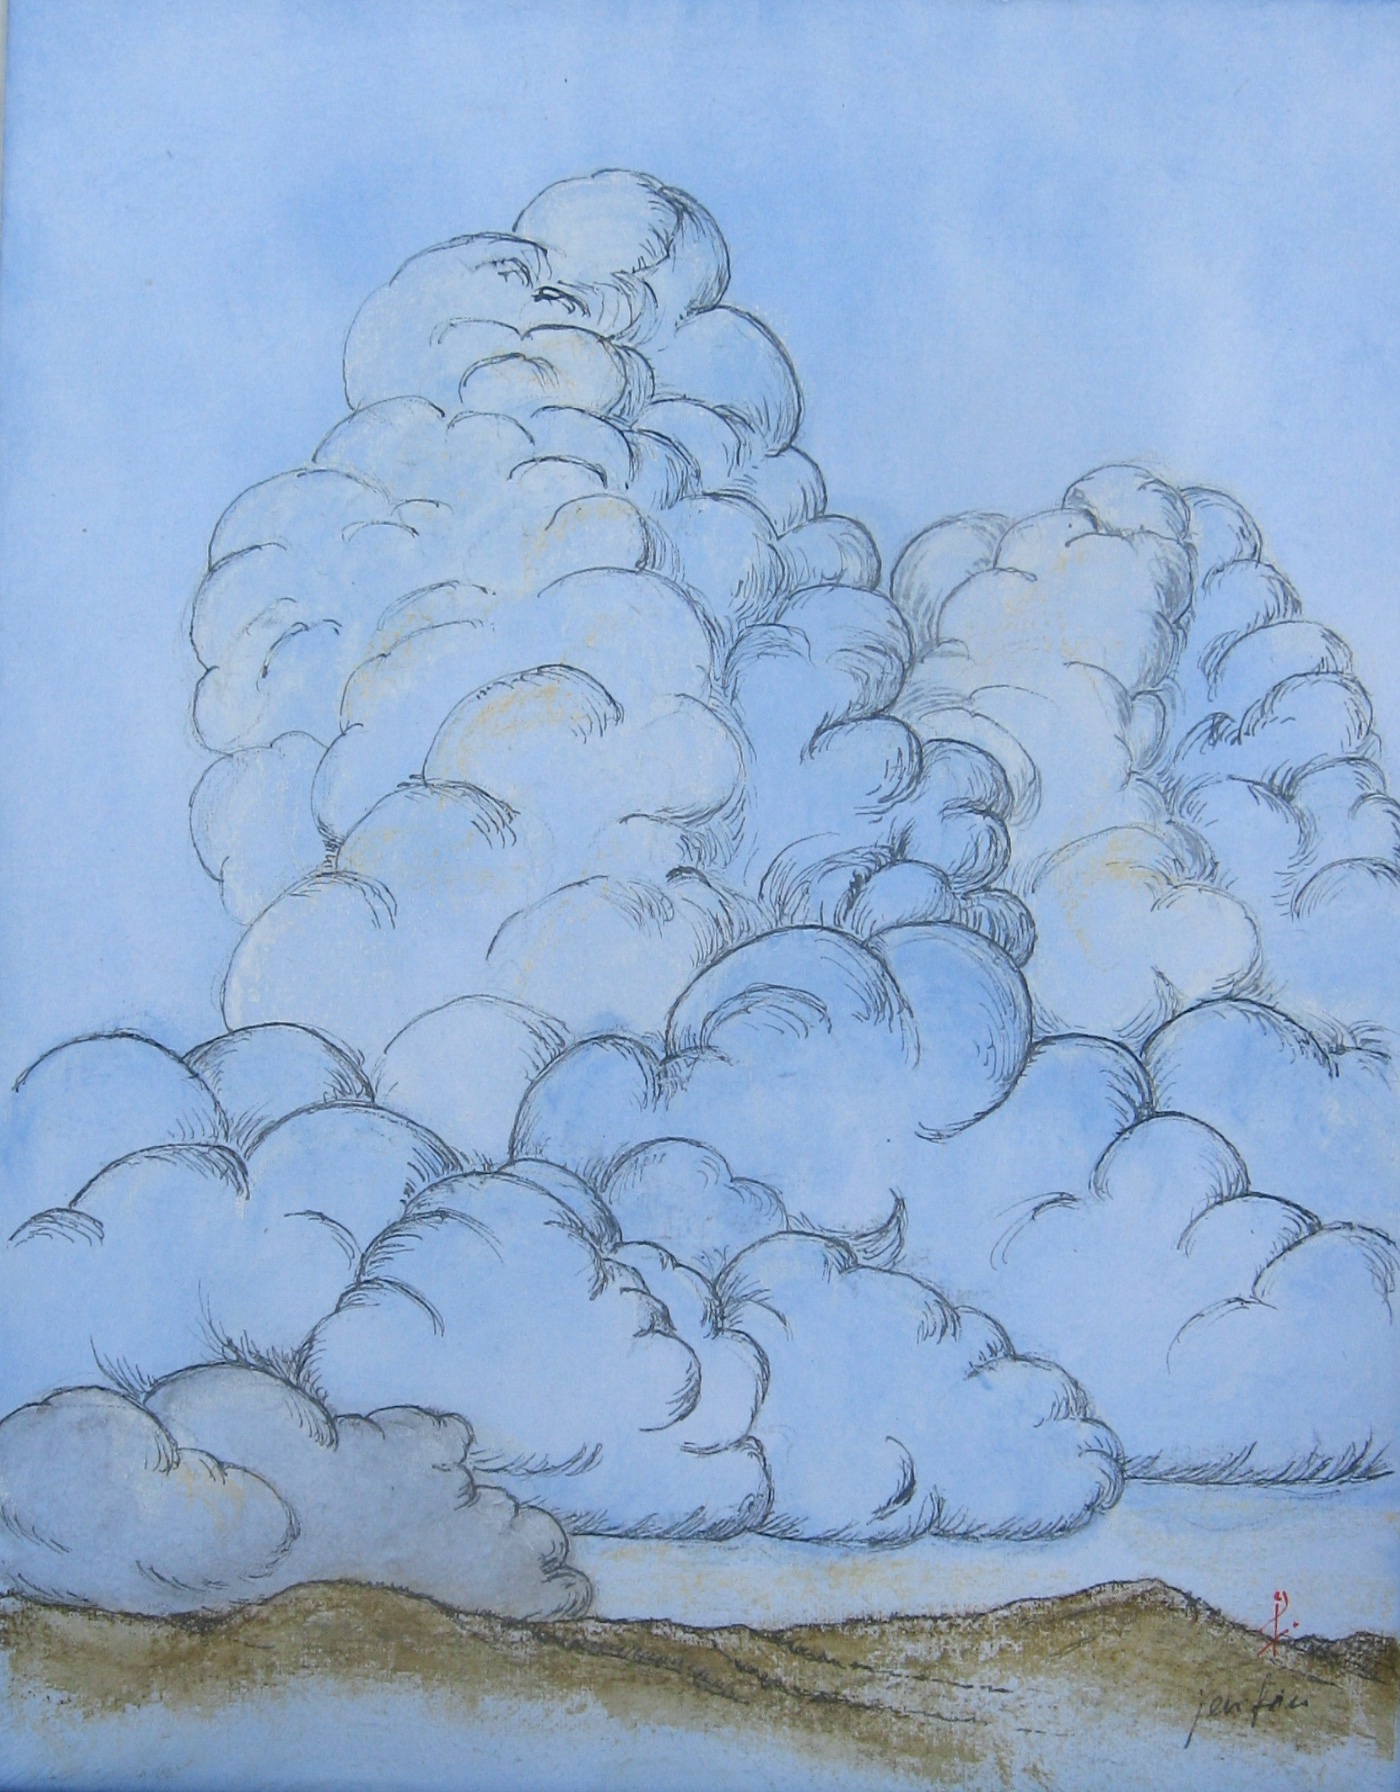
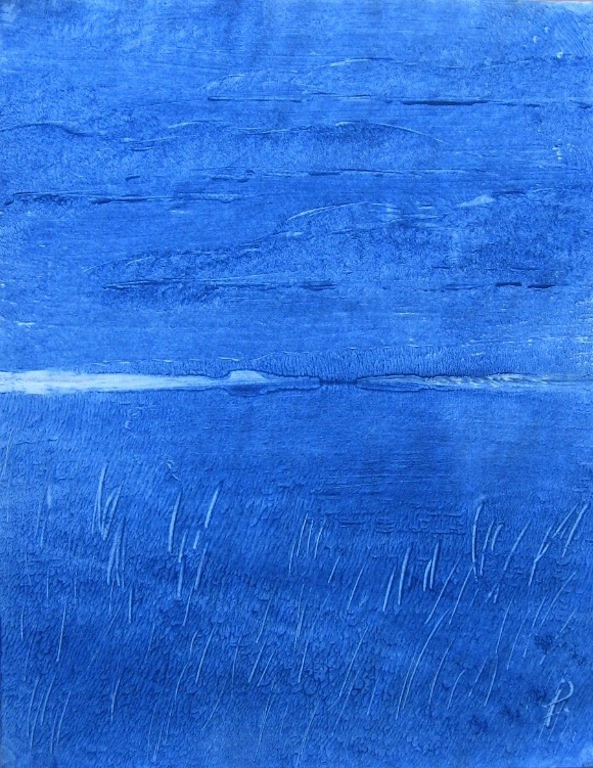
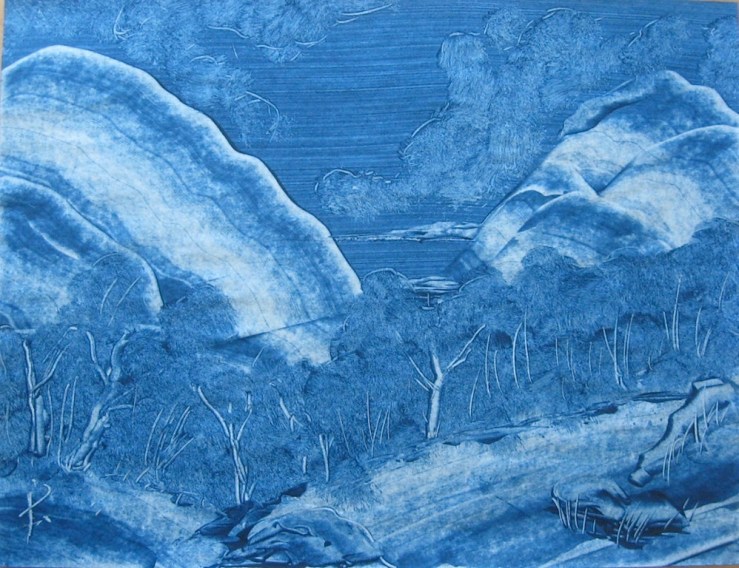
Behold! A selection of the art I’m bringing to the event.
Meet and Greet the Artist
Technically, I’m not literally opening my studio. I’ve been a member of the Brickbottom Artists Association of Somerville since 2020, but I only live near, not in, the physical Brickbottom Artists Buildings. I’m what we call an Affiliate Member. (Though, to be honest, I’m really freaking close, just a few streets away.) So I am bringing my studio to you, thanks to a kind and generous resident who is hosting several Affiliates for this year’s event.
I’ll have pieces for exhibition and pieces for sale, and I’ll be there to say hi, chat you up, answer all your questions great and small, and generally make myself pleasant.
Start Your Holiday Shopping Early
This is a great chance to exploit my fever of experimentation, as I will be showing a wide selection of small artworks and handmade cards for mailing or journaling, all very easy to buy, carry home, and gift to loved ones or yourself.
Works on canvas are ready to hang. Art Books and micro-zines can take you on amazing journeys, as books do. Mini paintings can adorn any desk, wall, cork board, or table, easily. And journaling and note cards are the ideal chance to embrace Art as Lifestyle, with original, unique abstract paintings designed for work as journaling cards, bookmarks, or note cards.
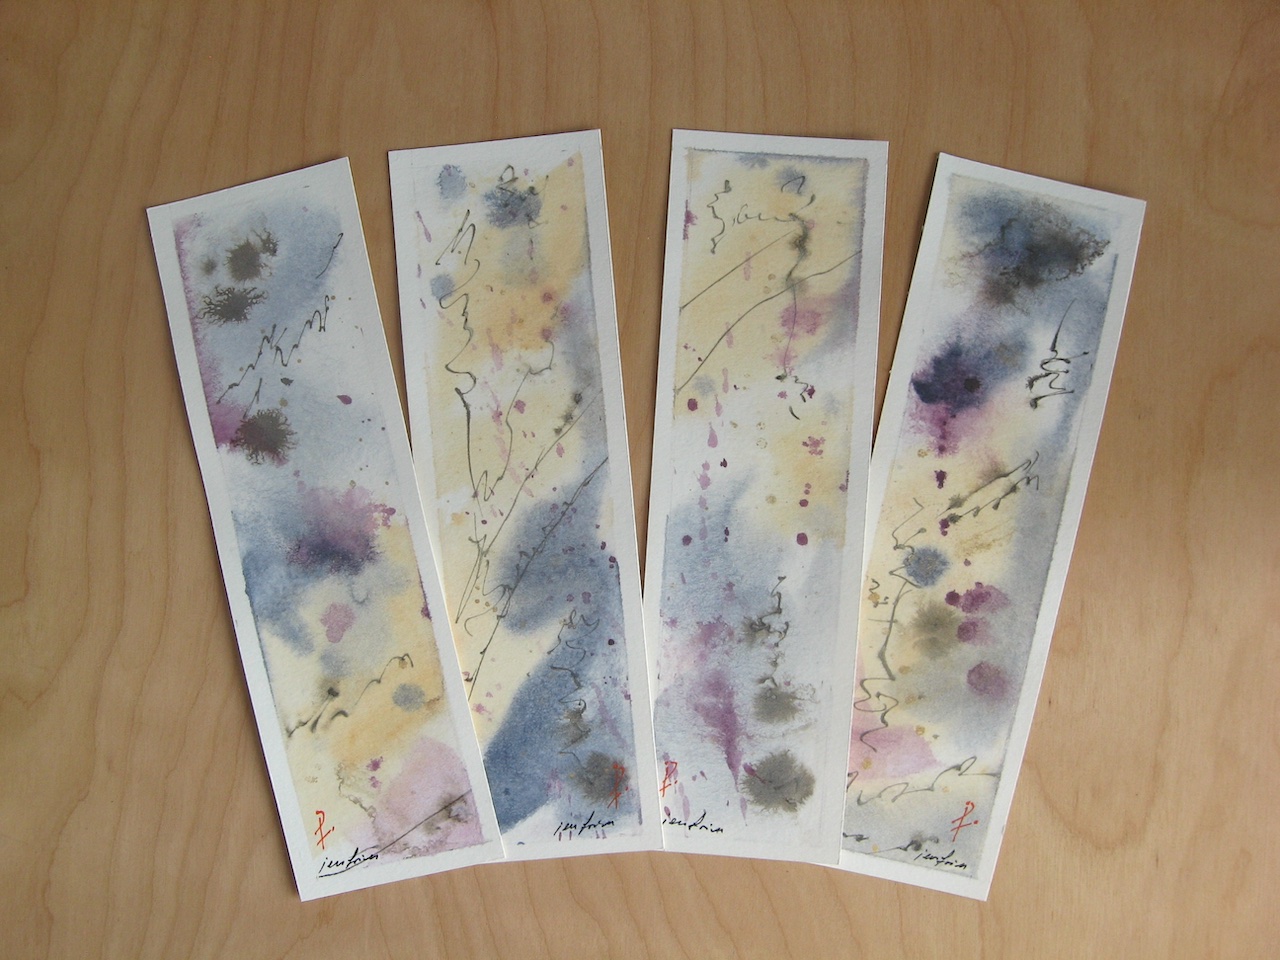
Hand-painted abstracts for journaling, writing, or display.
Business Stuff
If you’d like to buy some of my art, please be advised I’m accepting cash only at the event.
Yes, I know, it’s terribly backward of me, but I do so few of these events that it would actually be less efficient to set up a system to process credit cards.
But I realize it’s inconvenient for many of you, so you can also buy art online, right now or any time between now and the end of the event on Sunday evening.
If there’s any art on this site you particularly like, email me, and I’ll let you know if it’s available and for what price. You can buy it online before the weekend and pick it up from me in person at the Brickbottom.
The journaling cards are $15 each, or buy three and get a fourth card free.
Be sure to ask me about any other special offers as well as ongoing or future projects on the event days.
Brickbottom and Joy Street Open Studios, Nov. 23 & 24
End of November Web Forecast: Expect an unseasonably heavy flurry of update posts from yours truly for the rest of this week.
Okay, it’s been a period of time. My last post was made the night before Election Day in the US, and by now, we all know how it turned out. Sigh.
I just want to say that, for me, nothing has changed from what I wrote then. I chose hope. I’m not googling how to change my mind after the fact, like many maga voters reportedly did. You can read the full pre-election post here, if you missed it earlier.
However, when I say I choose hope, don’t expect any pollyanna-ist reassurances here at Jen Fries Arts. No fluttering of the thing with feathers. That’s not my scene. My style of hope is the kind that spits out a bloody tooth and wades back into the fray, because where there’s a will, there’s a way, and I will be damned if I ever give up on what I know to be right.
Of course, it’s all been terribly inconvenient. There were emergency jettisons of certain social and personal connections, some of whom wouldn’t leave quietly. I still feel physically like I’ve been in a car accident. There’s My Sainted Mom who feels just as bad and just as pissed off. And on top of everything else, the cat’s been poorly, poor baby.
All of it utterly derailed what was supposed to have been a whole month of prep and info for my Open Studios event, which is scheduled to start – checks notes – frikkin this weekend. November 23 and 24.
So this is just to get you all caught up. Expect an unusual-for-me rush of posts about the Brickbottom and Joy Street Open Studios weekend here in quaint and romantic Somerville, MA. Also some website and shop updates. I’ll be doing all this work tonight and tomorrow, basically. Apologies in advance, but the new info will be good for you to have.
For starters:
Open Studios, November 23 and 24, at the Brickbottom Artists Building, 1 Fitchburg Street, Somerville, MA.
I’ll be sharing space with some colleagues in Unit B450, in the Bakery Building of the Brickbottom complex.
I seldom do these kinds of events, so this will be a rare opportunity to see me outside my little stoat burrow. I’ll be showing small to medium works on canvas or paper, hand-painted journaling cards, some micro-zines, and maybe some hand-made art books if I can finish them on time. I’m also up for chit-chat about methods, styles, affordability, sustainability, and life in the zombie apocalypse.
So if you’re around then and there, come on by. Info at Brickbottom.org.
I joined Bluesky as an alternative to Facebook, but I am still also on Facebook and Patreon. Of course, it’s all just social media with the usual nonsense, so …
Become a Subscriber.
I encourage everyone to subscribe for free to this website, comment on posts, and follow my projects and articles free of algorithmic interference.
Click the little blue WordPress Follow button at the bottom of this and every page to subscribe. And don’t forget to set your notifications preferences, because another upcoming update is that this blog will also serve as my newsletter, with a monthly round-up and other exclusive subscriber content in the new year.
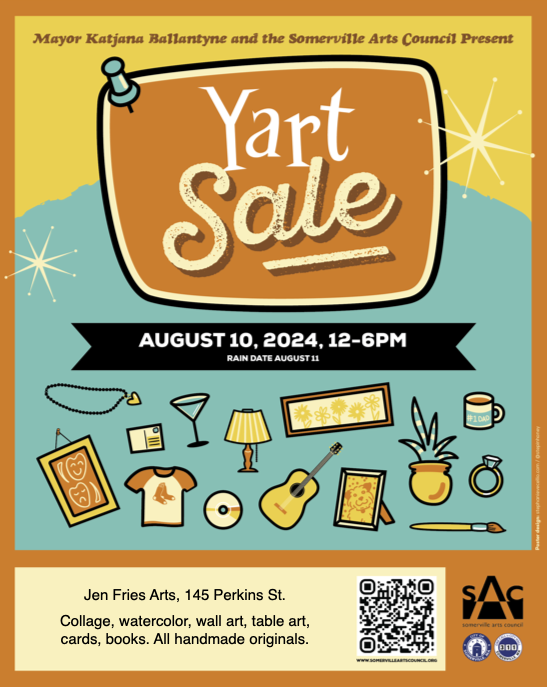
It has a kooky name, but it’s a fun event. In Somerville’s city-wide Yart Sale, Saturday, August 10th, the local arts community open up their yards and front porches for impromptu art exhibitions and sales. It’s a relaxed way to get to know your more boho neighbors, soak up the culture of Our Fair City, and maybe pick up something beautiful for your home or a gift. I’ll be participating again this year, showing new and favorite works.
Rain is predicted, but the forecasts so far think it will clear out well before noon on Saturday, so we should be good to go. Just in case, the rain date is Sunday, 8/11.
Visit the Somerville Arts Council Yart Sale page for event details and an interactive online map of all the participants, HERE.
I will be on my porch, 12:00 to 6:00PM, with a short break at around 3:00.
I’ll be showing paintings and collages, artist books, and tiny art that’s great for bookmarks, journaling, and notecards. If you will be in the Somerville area this weekend, do stop by for a meet-and-greet.
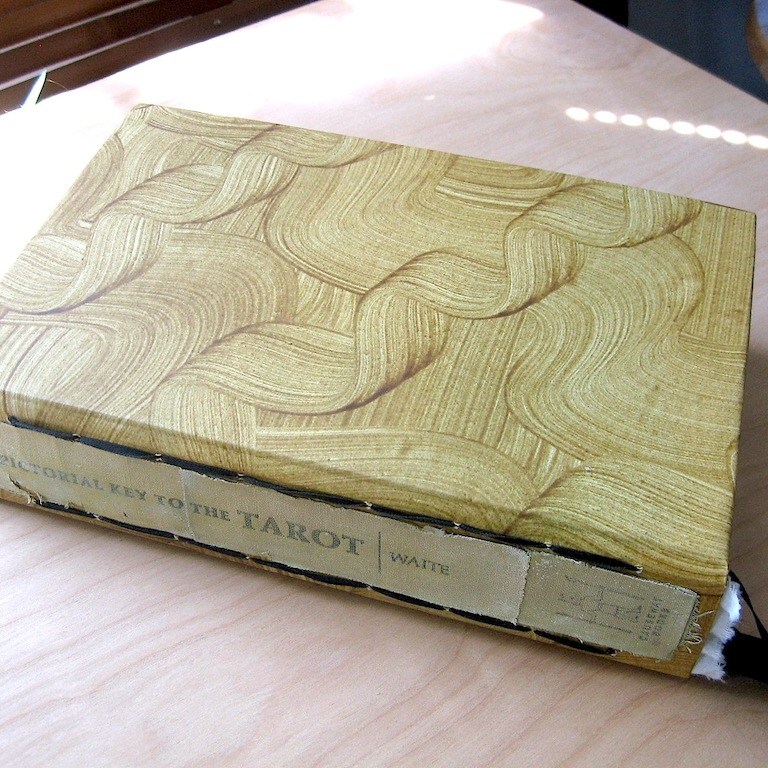
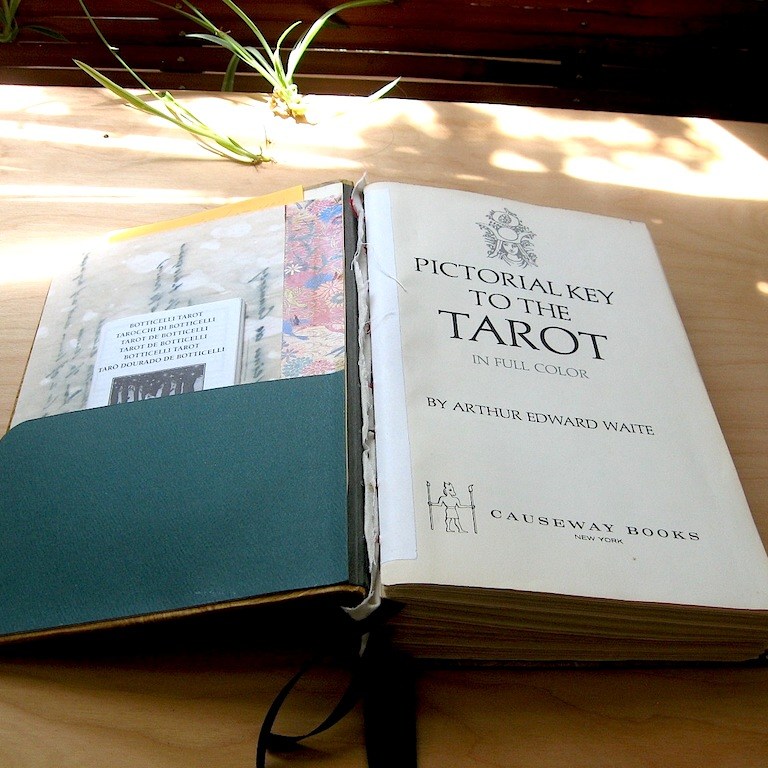
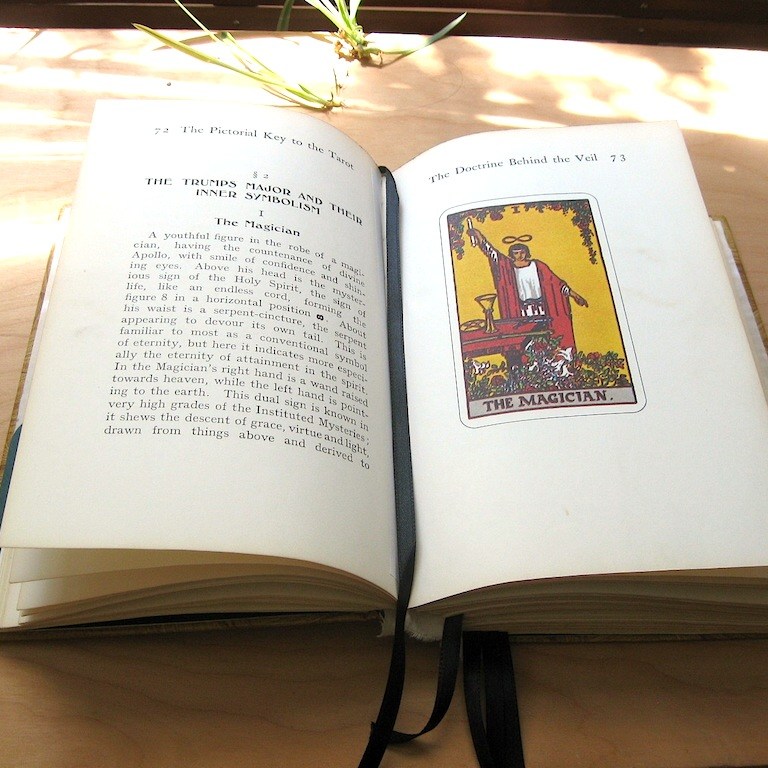
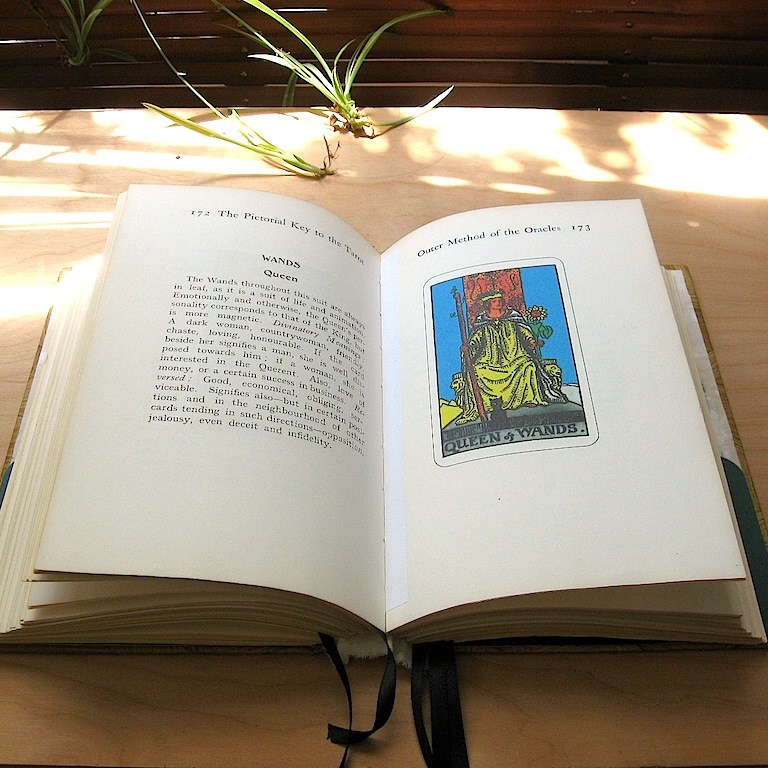
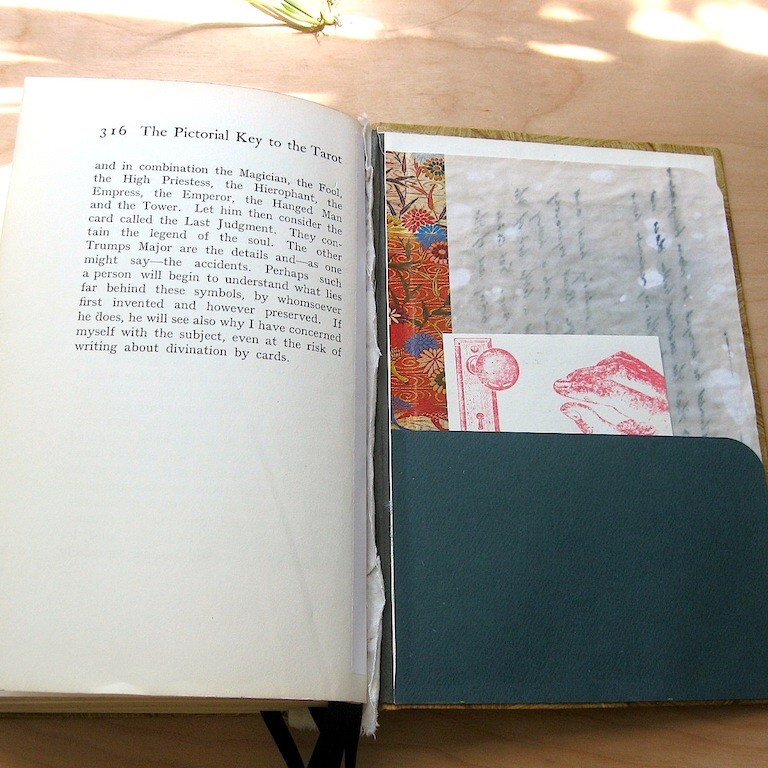
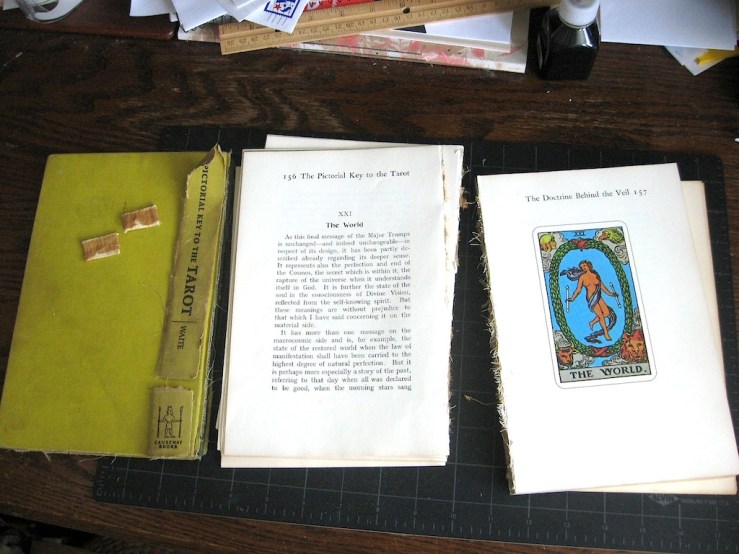
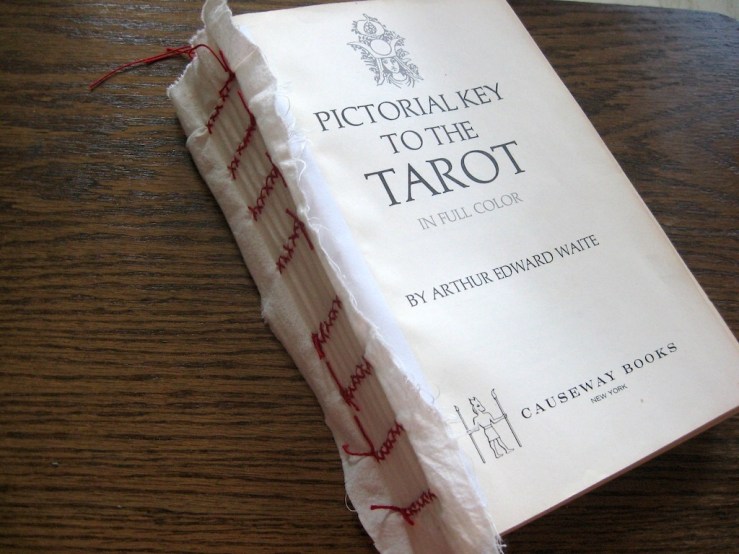
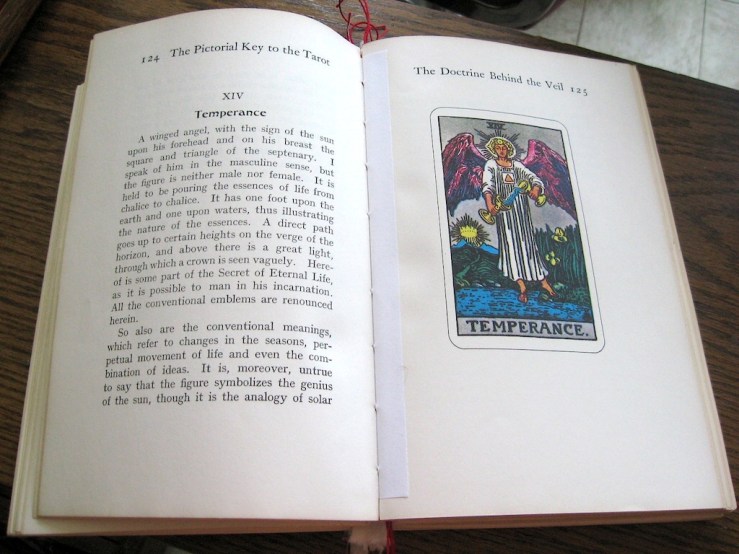
This month, I finally finished one of my projects, the re-binding of my Pictorial Key to the Tarot. You saw it in progress in my last posting. Below are some photos of the finished book.
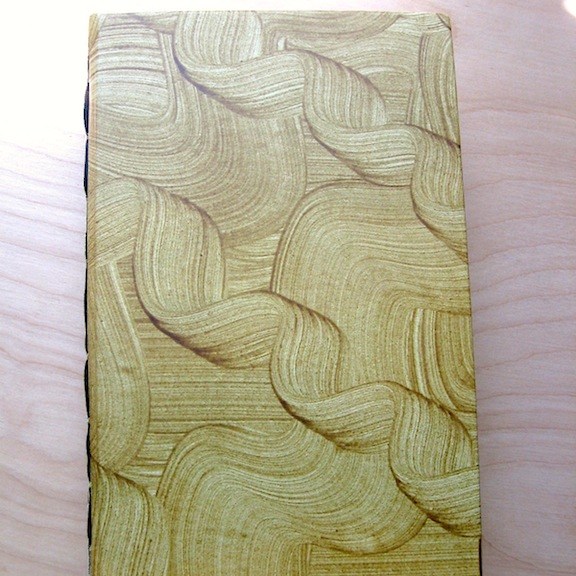
The new cover uses the boards of the original cover wrapped in a one-of-a-kind decorative paste paper I made recently. I salvaged the torn, beat-up, original spine label, fading it a bit more with a lick of paint. The lines of fine black ribbon on either side of the spine are the exposed stitching attaching the cover to the book. I went with my preferred adhesive-free, sewn binding. The inside covers, front and back, have double pockets for notes, and I included five permanent ribbon bookmarks. As you can see, the book lies open very easily. Closed, it looks quite fetching on my bookshelf as well.
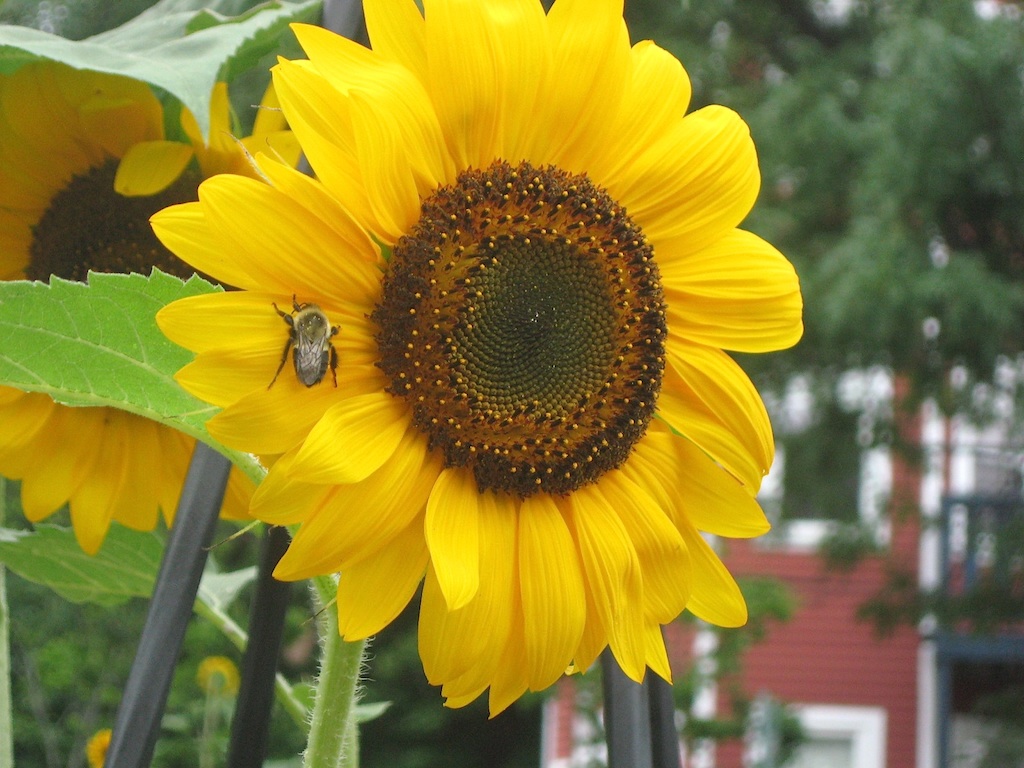
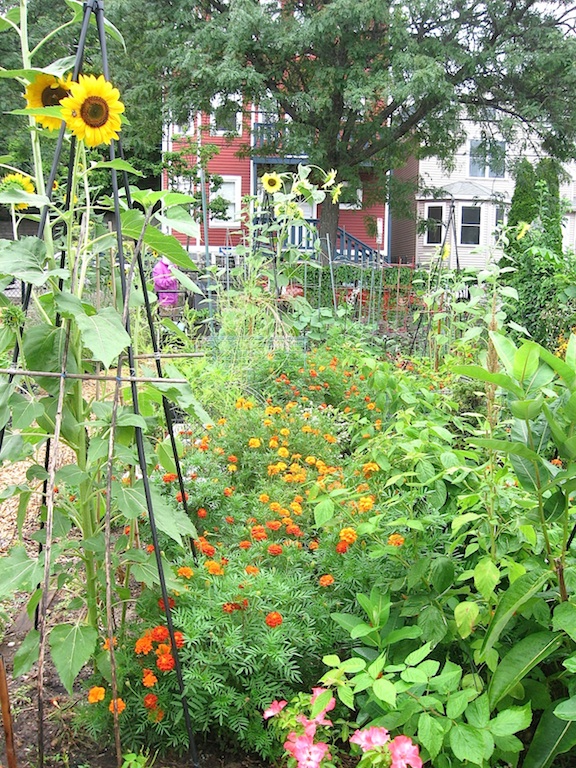
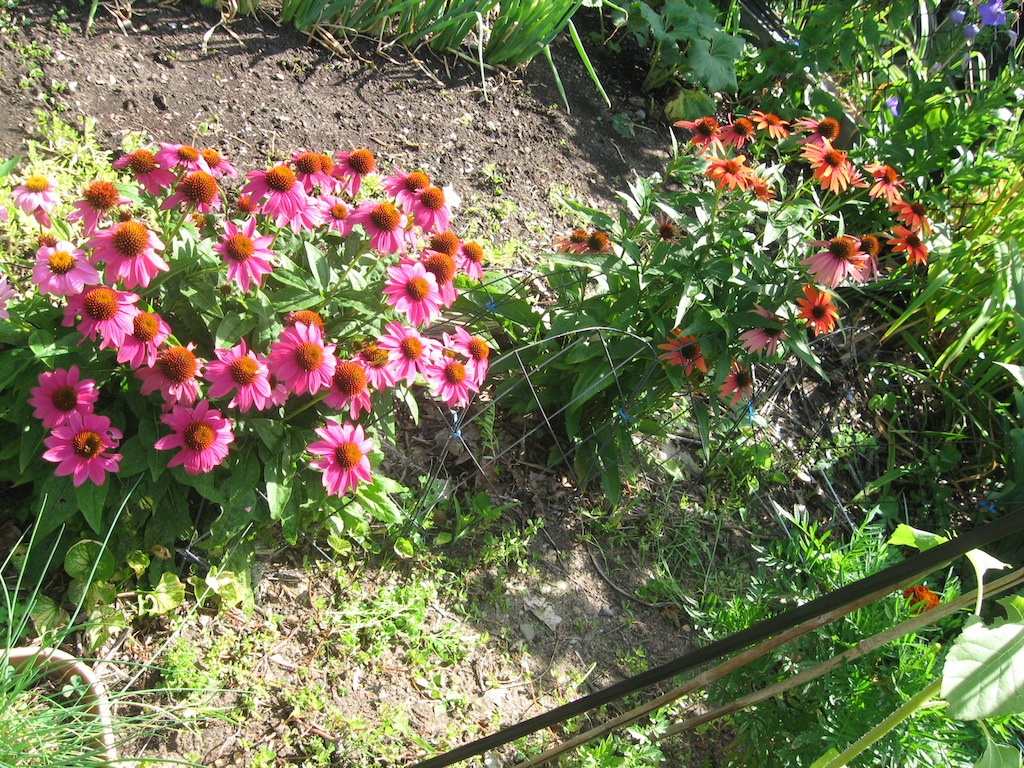
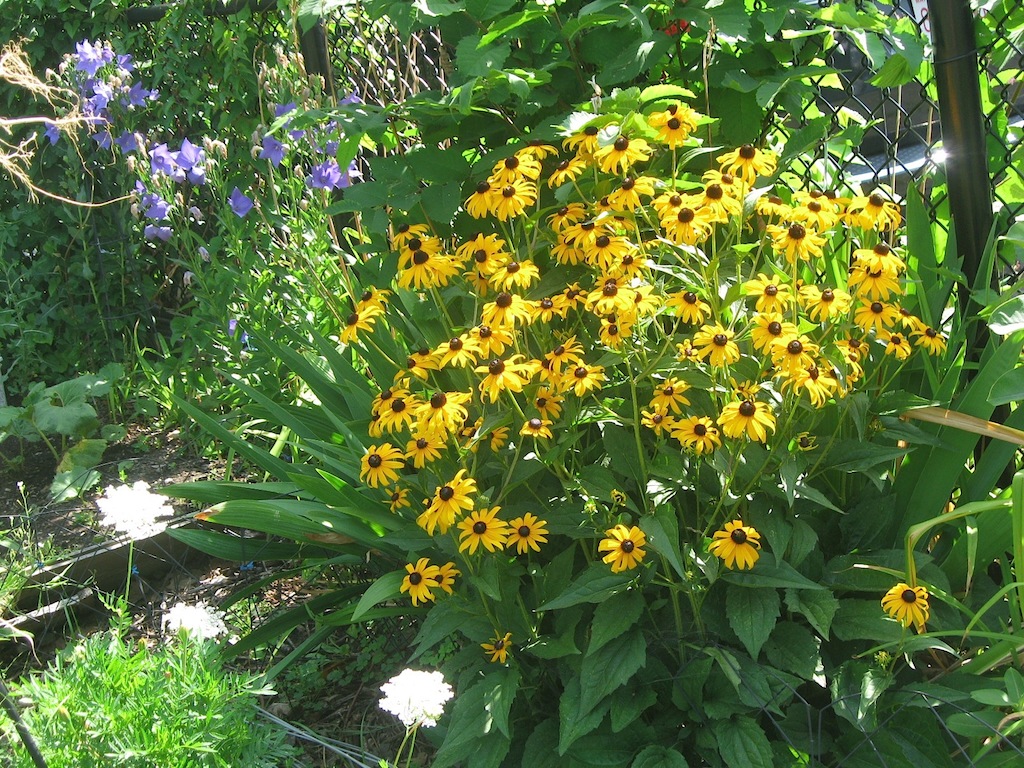
What else is going on? Flowers! Bees! The garden is a satisfying riot of gorgeousness and buzzing. We’ve suffered through some heavy heat and rain, but all is well on the flora and fauna front.
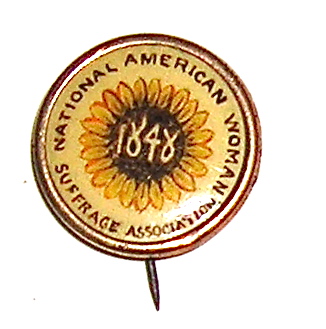
I learned today that the sunflower is associated with the women’s suffrage movement. It was used on a button of the National American Woman Suffrage Association for their 1867 Kansas campaign, and was Elizabeth Cady Stanton’s pen-name in the women’s newspaper, The Lily. (Elizabeth Cady Stanton Hometown Association) As 2020 marks the 100th anniversary of the ratification of the 19th Amendment, guaranteeing women the vote in the US, I’m feeling a little extra pride in my lovely, tall, nodding, giant flowers.
Also, exciting announcement, a shop-like arrangement is in the works. Watch this space for updates on when works will become available to buy. I’m a little terrified by the prospect, but it’s really happening. The paperwork is mostly in hand.
Surprisingly busy this summer, despite the distancing and closing. I hope you have been having a good summer, too, and enjoying the weather or at least beating the heat.
To catch you up:
Estuary Moon is viewable at the Brickbottom Gallery online, along with works by many other wonderful artists. You can find that exhibition here, through August 15.
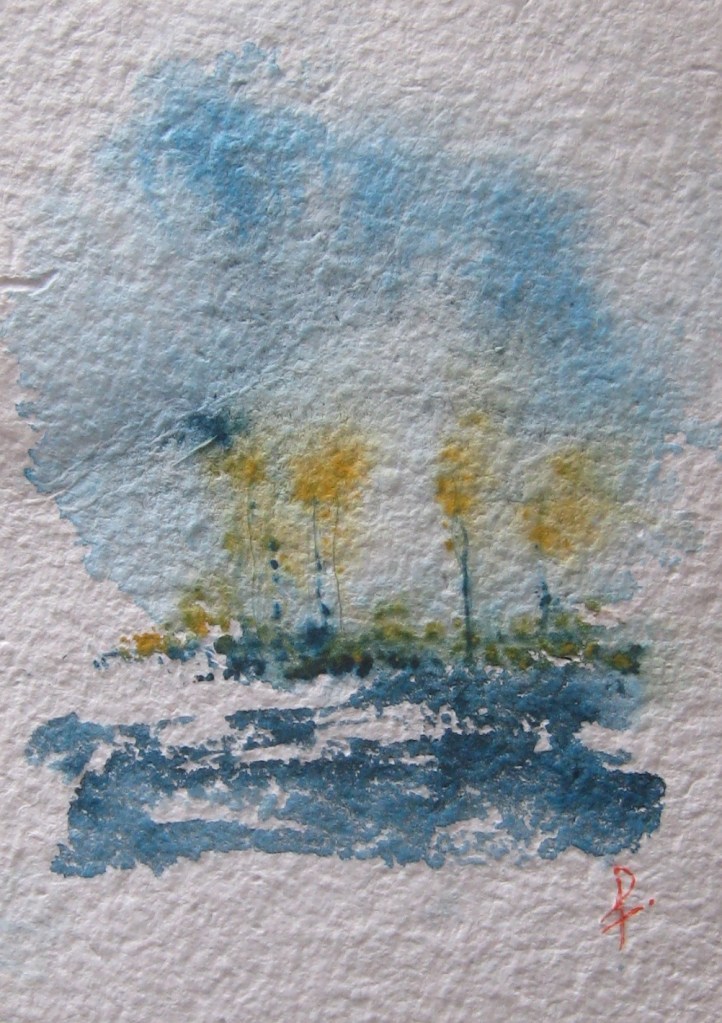
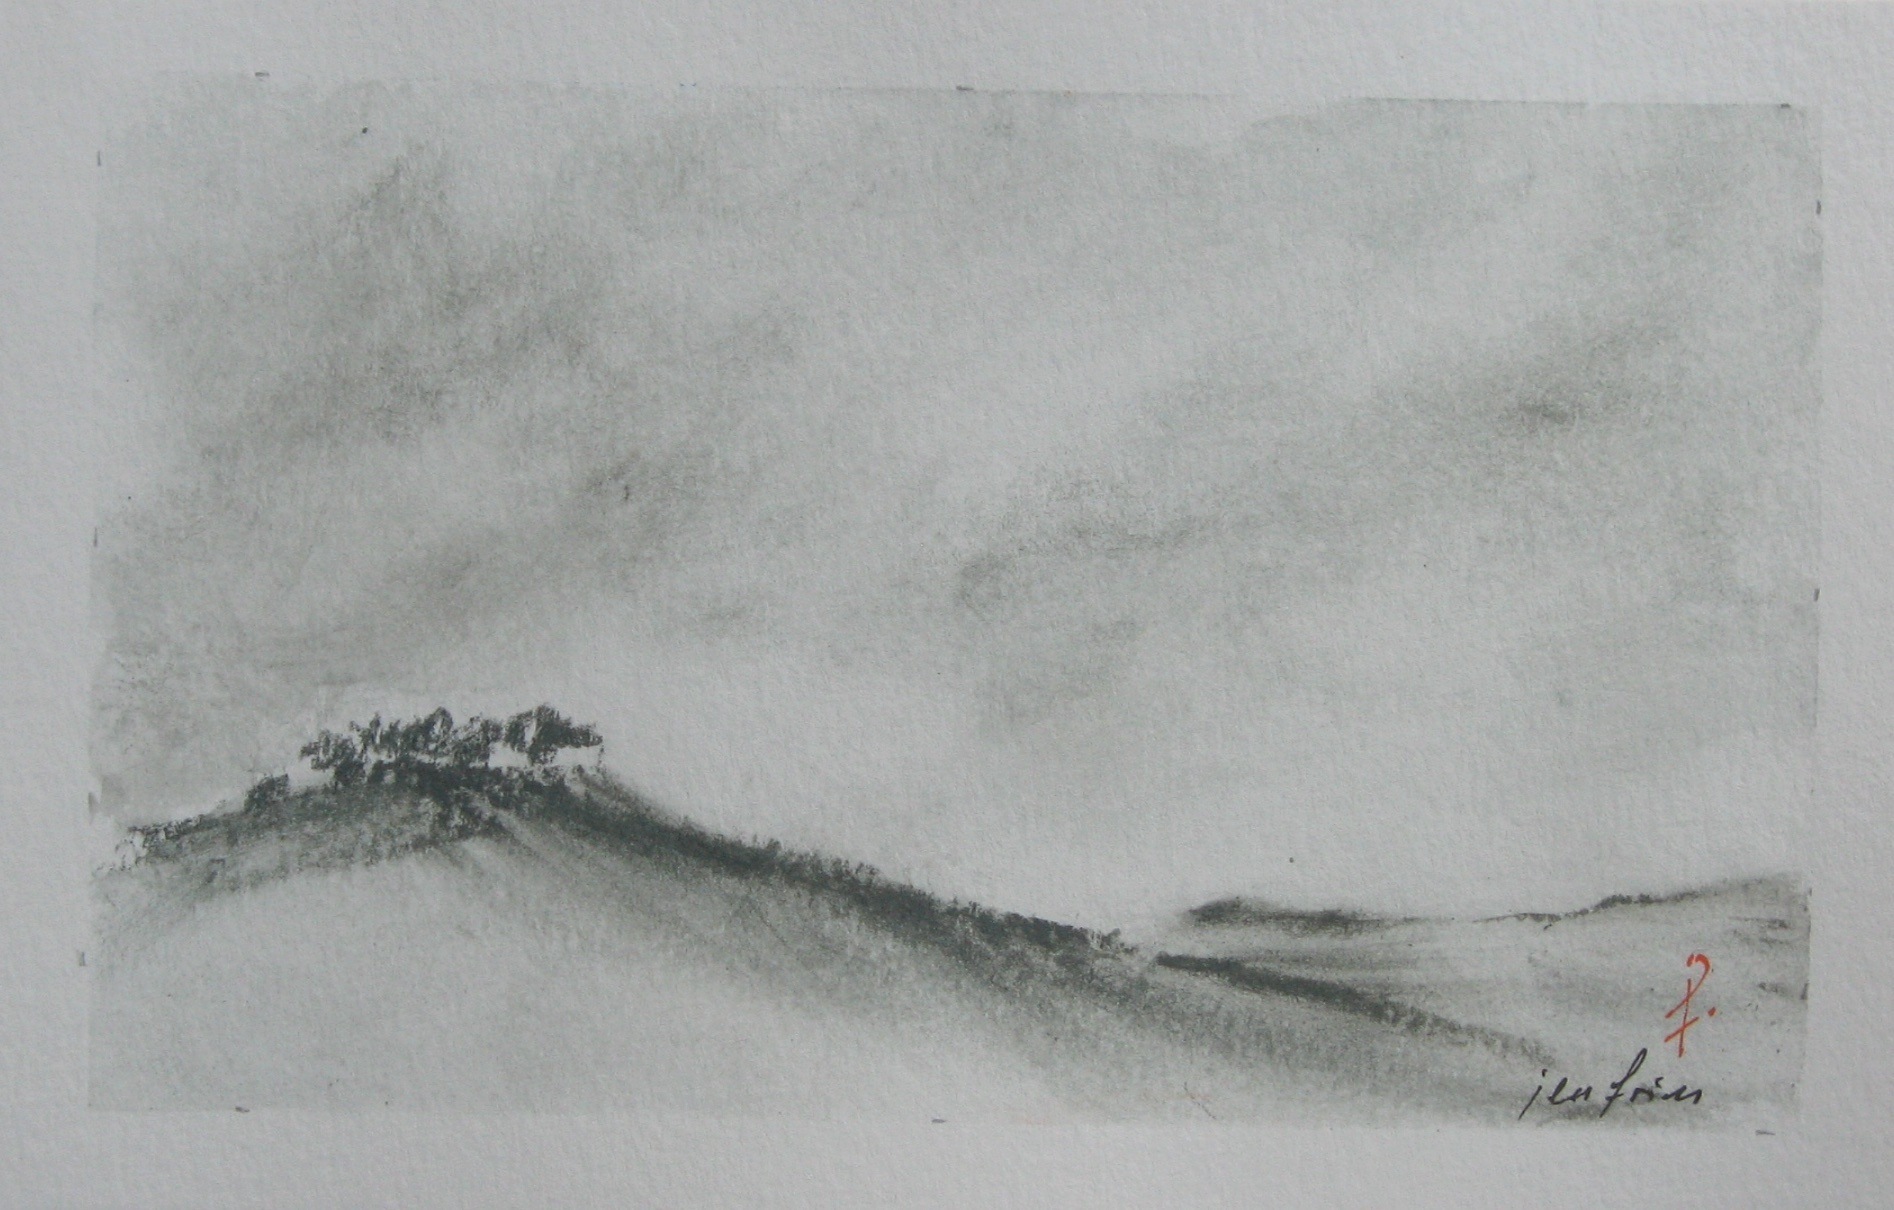
I’ve been experimenting with new-to-me techniques, resulting in a new collection of small monochrome landscapes, acrylic on paper. You can find those under Artworks, here.
I’ve also been rebinding an old book from my library – a 1970’s hard cover edition of Arthur E. Waite’s Pictorial Key to the Tarot, a gift from my friends back in high school. It’s a low-budget, no-frills book, but it has sentimental value, so when the binding finally started to give up the ghost, I decided to rehabilitate it with my favorite non-adhesive book style, the Japanese tetsuyoso binding. It’s quite the job, as the 40-year-old glue did not want to come off, despite dropping pages. I had to do more cutting and reconstructing than I’d hoped, and I added some muslin to reinforce the spine, but it’s going well. The refurbished cover, dressed in one of my paste papers, is drying under weight as I write this.
Pictorial Key to the Tarot in progress
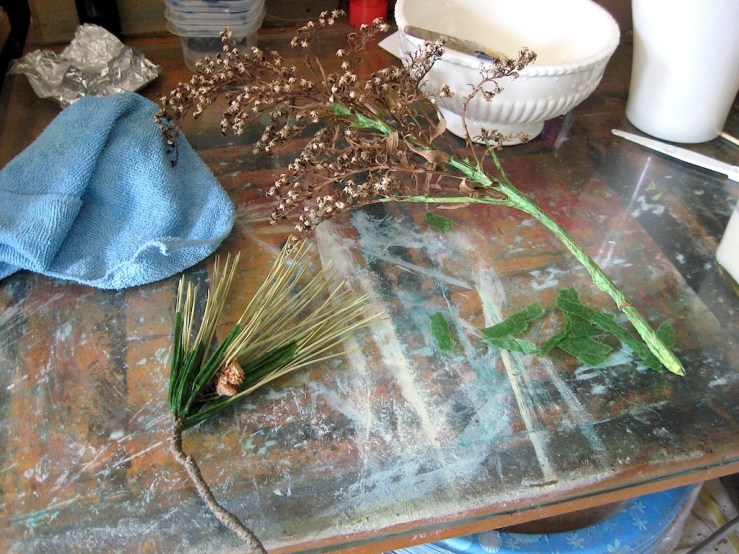
More reconstructed botanicals are coming up. White pine and goldenrod are in progress.
And I did a bit of housekeeping on the website – cleaned up the images, consolidated the books under one heading. The Artworks pages look cleaner and prettier now.
Outside the studio, it’s been pretty much gardening and birding round the clock. Well…I’m not going to any shopping malls, that’s for sure. The community garden is at war with our local city rabbits, but while others engage in brute force with brooms and hoses, I have entered into a psychological battle with one particular adorable fluff-nugget who has a fondness for bean tendrils. Yeah, okay, Peter Cottontail, but I notice he doesn’t touch the aromatic herbs, tomatoes, or turnip greens, so guess what this garden will look like next year? Buckle-up, Buttercup. It is brought.
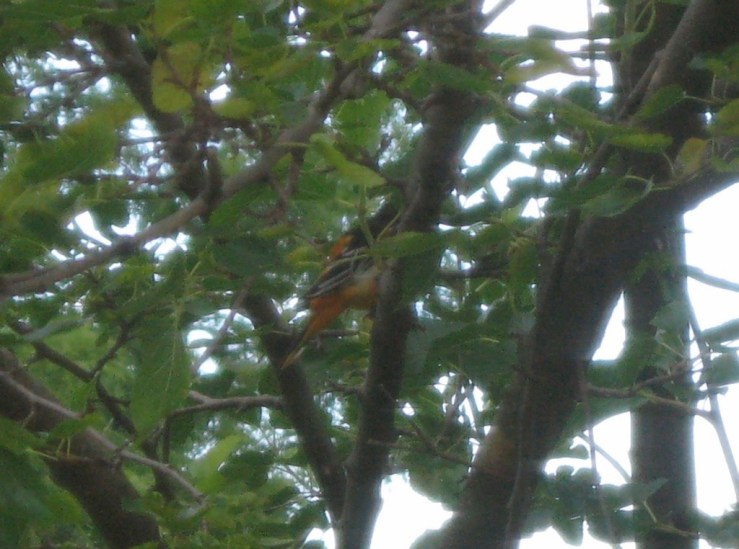
We’ve also had a fun summer visitor to the mulberry tree outside our kitchen window. Camera-shy little thing – this is the best shot I’ve gotten of him – but from the color, the wing markings, and a brief glimpse of his beak shape, I believe this is a Baltimore oriole. The first I’ve seen in scenic Somerville. Judge for yourself, comparing my blurry photo to the entry in AllAboutBirds.org.
Sneaky glimpse through the bushes. It’s totally an oriole.
It’s not easy to write upbeat blog posts these days, what with all that’s going on. I’m not even going to say “in the world.” Let’s just call it – things are not swell in the USA, and yes, there are people to blame for that. I spend about as much time as most people worrying and growling over it. There is a lot of uncooperative BS being bandied about that I am completely over and done with, together with the people spouting it, and the horses they rode in on. Done. I’m just done. It makes staying home easier, at any rate.
But after all, my sainted mother and I and our immediate neighbors are all healthy, and there’s a Baltimore oriole outside my kitchen window. What have I got to complain about? (Okay, plenty, but you know what I mean.)
So take care. Be well. Wear your masks. And look out your windows. There’s probably something pretty and amazing out there that will lift you up and keep you going.
It’s been a season of ups and downs, hasn’t it? These past few weeks have been all business-business-work-work-work, with little time for art, and not much for enjoying the holidays, either. But art and holidays are here nonetheless, and by hook or by crook, I’m going to wrest some festivity out of December.
So, for all you wonderful folks who follow this site (thank you so much!) and for all harried, distracted, stressed-out folks in need of a last-minute gift, I offer an easy, free tutorial for making notebooks from altered greeting cards. A little gift from me to express a lot of appreciation for you.
First some work-work news:
I have posted a new Privacy Policy for Jen Fries Arts. The link is in the footer of each page and under the Home tab. Please take a moment to read it.
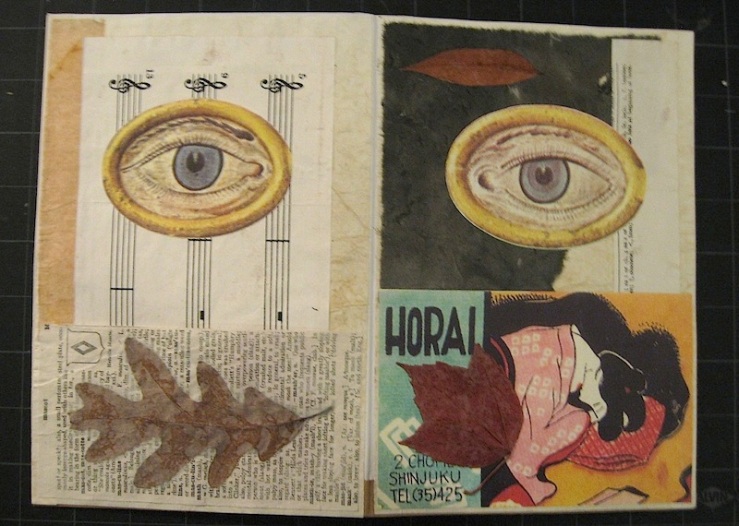
I have added the leaf specimens and the autumn zines to the Artworks gallery under Cities, Botanicals, and Zines and Art Books.
I am working on more leaf specimens as we glide into winter proper, so look for those before the new year.
And now, the tutorial.
Altered Greeting Card Notebooks
Do you like greeting cards but wish they were more useful? Do you have treasured cards from friends and family and want to do more than keep them in a box somewhere? Let’s remake them into notebooks!
This project uses sharp tools and is best for teens and adults. Kids may participate with adult supervision.
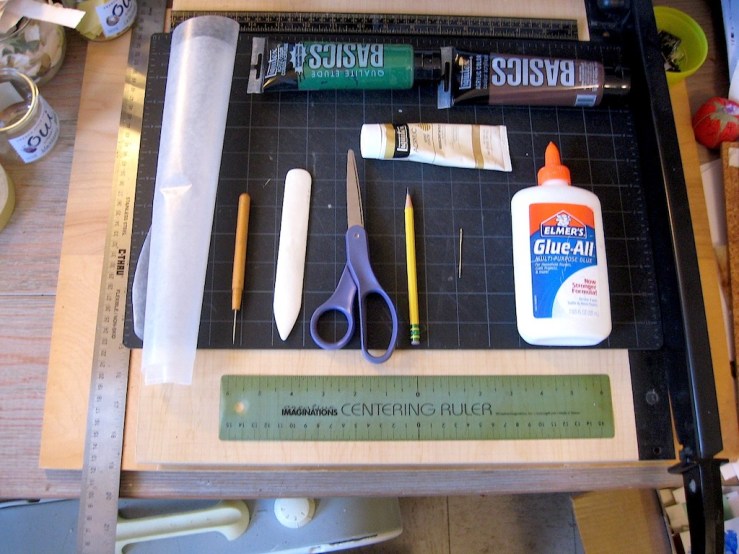
You will need:
Greeting cards, old or new
Paper – writing or printer paper is best
Ephemera, stickers, scrap paper, paint, stamps, ink, etc. (optional)
String or embroidery cotton
Tapestry or embroidery needle – blunt point and big eye
Scissors
Book awl or other fine pokey tool
Ruler
Bone folder (optional)
Pencil and eraser
Paper clips
Cutting blade or paper cutter
Cutting mat or other surface safe for cutting and poking
Paper glue
Wax paper
Step 1: Design
A) Take a look at your cards. These will be the covers of your notebooks.
How big are they? If they have a printed message, do you want to keep it? Do you want to change the image, color, or feel of the cards? Do you want to do anything to the back of the cards?
For this project, we’ll keep things simple and just add some color and pockets to the insides of the cards.
B) Experiment to see how many pages your cards can hold and still close comfortably. For this project we will use 5 folded sheets per card.
TIP: The number of pages will depend on how you plan to use your altered card notebook. Five sheets is comfortable for writing and drawing. If you plan to paste in family pictures or memorabilia, those will add thickness, so use fewer sheets.
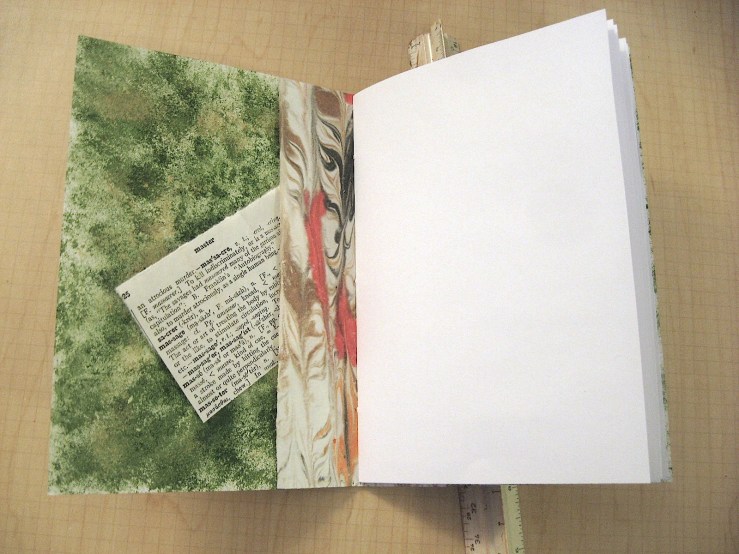
Add little pockets and tuck spots.
Step 2: Embellish your cover
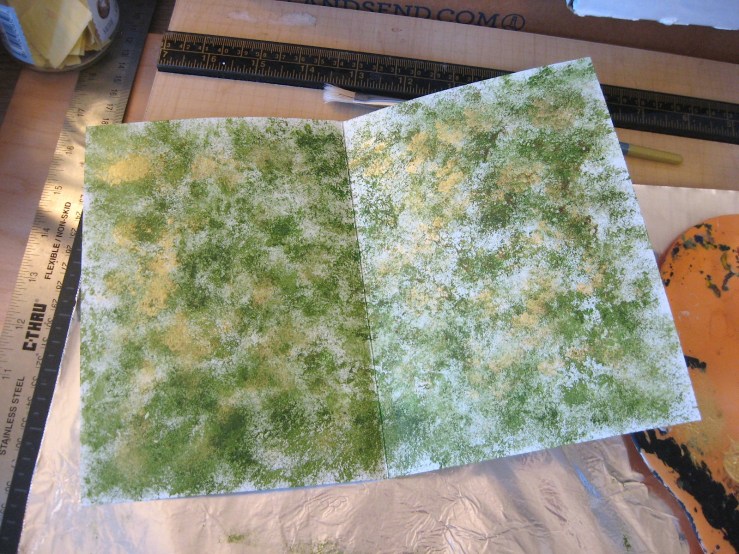
A) Apply your background paper or color. For this project, we are using acrylic paint. If you want to keep the printed message, cover it with a piece of paper to protect it. Lightly sponge or splatter the paint over the inside of the card. Work fast with small amounts of color. Keep your sponge or brush as dry as you can and still get color onto the card. Keep going until you like how it looks. Allow to dry.
B) Cut paper for the inside pockets and fit them in where you want them to be. Glue in place. Do the same with any other ephemera you wish.
Sponged acrylic paint. Use a light hand with paint and glue.
TIP: Use as little glue and paint as possible to avoid warping the card. They tend to be very warpy. If using paint or ink, it’s better to do several light, dry layers than one heavy, wet one.
C) Lay a sheet of wax paper inside the card, and let it dry closed under weight, such as under a few books. This should not take long. Prep your pages while you wait.
Use care with cutting tools.
Step 3: Cut and fold your pages
A) Measure your card from the top edge to the bottom edge. That is the height of your pages.
B) Measure your card from the center fold to the outer edge of the face of the card. That will be the width of your pages.
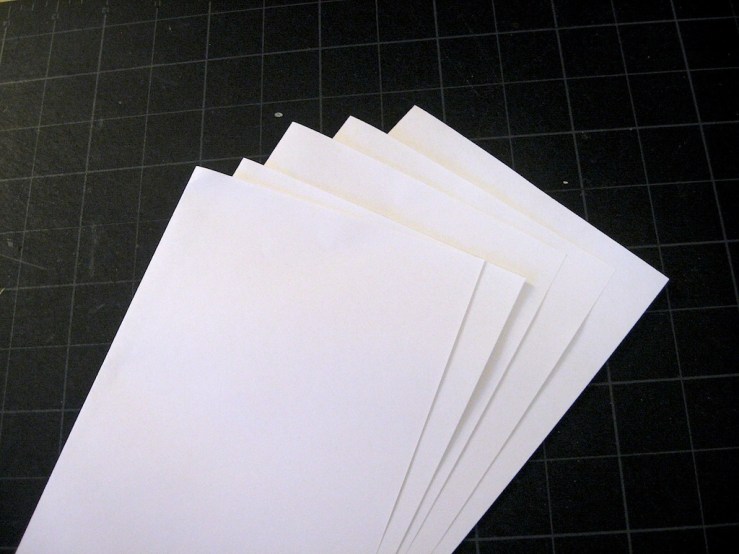
C) Mark the height and width measurements in pencil on one sheet of paper. Stack five sheets, and trim them all together with your blade or paper cutter. Erase any remaining pencil marks
TIP: Greeting cards are often folded a little off center, so no matter how you measure your pages, it won’t be perfect. For now, measure just the front face of your card. Then double that measurement to get the full width of your page sheets. This will make sure the pages match the part that people will look at the most.
Folded sheets nested together.
D) Fold each sheet of paper in half, using the bone folder to sharpen the creases if you like. Then nest the folded sheets together. This is your signature of pages. Snug the signature into the card and see if you want to trim the edges any more. Be careful – the more paper you try to cut through at once, the more likely you’ll get a mis-cut.
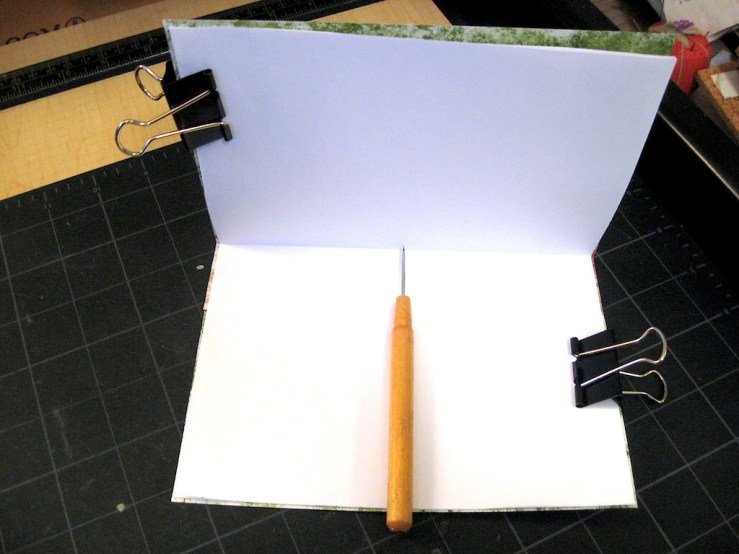
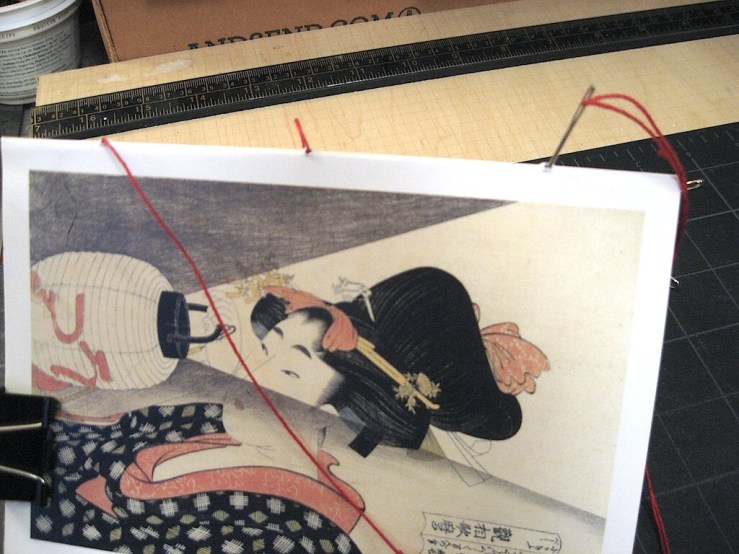
Step 4: Sewing your notebook
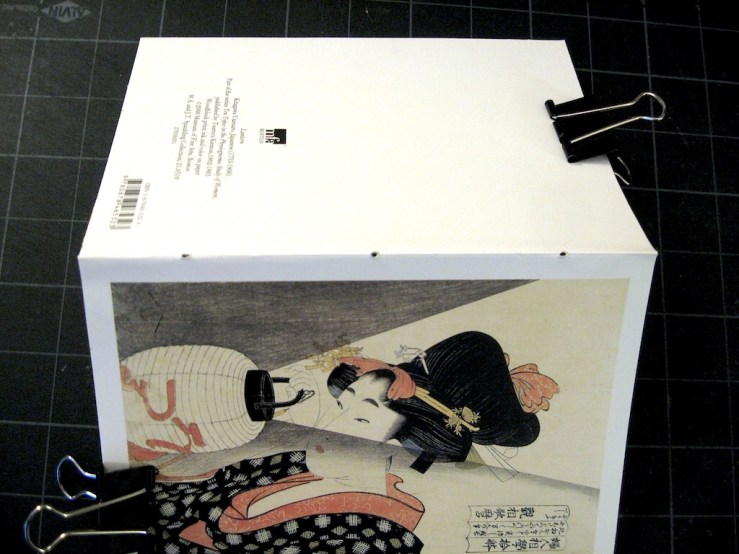
A) Nest the signature into the card as snugly as possible. Use clips to hold the pages and card together, if needed.
Clips hold the pages and cover together while sewing.
B) With your awl or pokey tool, punch three holes into the center fold line, making sure to go through all the layers. Place the holes at the center and a comfortable distance in from the top and bottom edges. You can measure, but it’s okay to eyeball it. Wiggle the awl in the holes to make sure they are all well open for ease of sewing.
It’s easier to pierce from the inside of the book than the outside.
TIP: Don’t flatten the notebook completely to make the sewing holes. Holding it slightly closed so you are piercing into the fold makes it easier to keep the holes right on the spine.
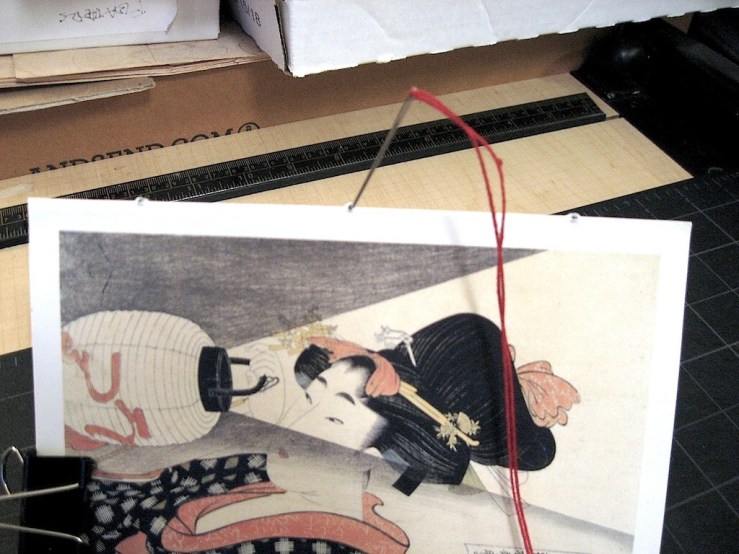
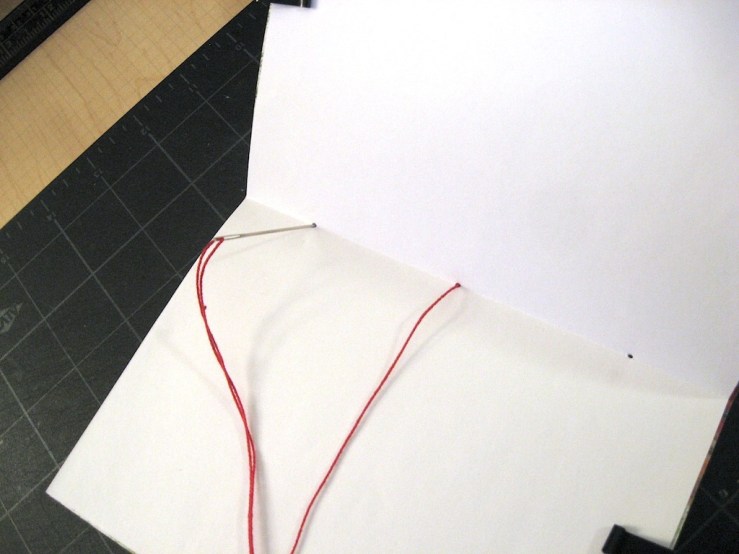
C) Cut about an arm’s length of string or thread to give you enough to work with. Thread your needle.
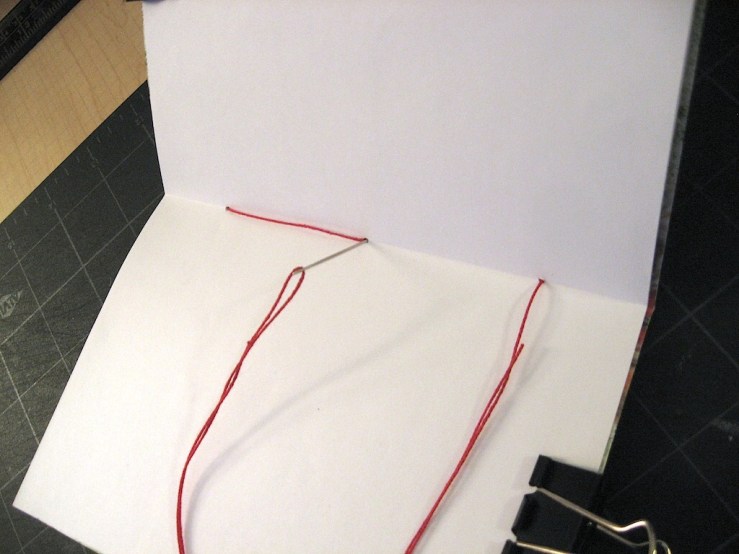
D) Sew the book as follows:
1) From the outside of the book, go in the center hole. Leave a good tail hanging.
2) From the inside of the book, go out one of the edge holes.
3) From the outside of the book, go in the other edge hole.
4) From the inside of the book, go out the center hole.
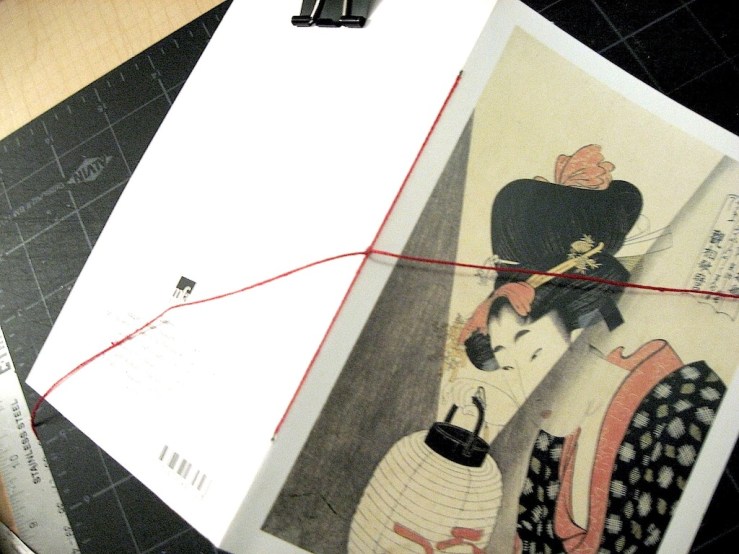
Looking at the outside of the book, you should have a long line of thread along the spine and two tails hanging loose from the center. Make sure the line of thread runs between the two tails.
5) Tie the tails in a knot or bow over the line of thread to anchor everything in place. Pull snugly but not too hard, or you might tear the paper. Trim the thread ends to desired length.
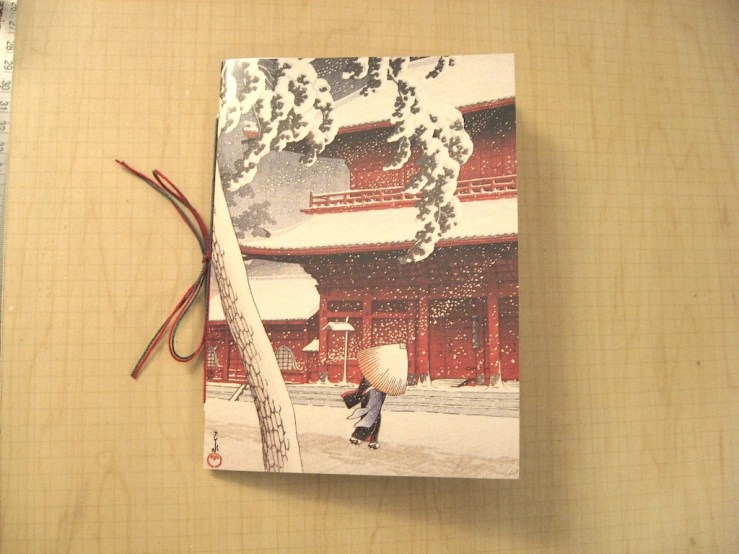
And you are done!
These little altered card notebooks make a wonderful gift for Christmas or any holiday or occasion. Make a little brag book for the grandparents, or a guide to dorm life for a new college student. Going on vacation? Make a travel journal with a card featuring your destination to collect special ephemera on your trip. Or take that special card you received from someone close and make it a journal of what they mean to you.
If you make some of these notebooks, I’d love to hear about it and see some pictures.
Well, the holiday season is officially upon us, and in the midst of life’s battles, I have to admit I have a lot to be thankful for. We have our health at my house (knock wood). I enjoy my work, my town, my friends. There are birds outside my window and cats sleeping on my bed. What more can anyone want?
Later, I’ll rant about all the things that are off the rails, going wrong, just plain nuts, and utterly intolerable, but that’s not what this weekend is for. Today, it’s about feasting and merriment, football, parades, and King Kong. You know, the traditions.
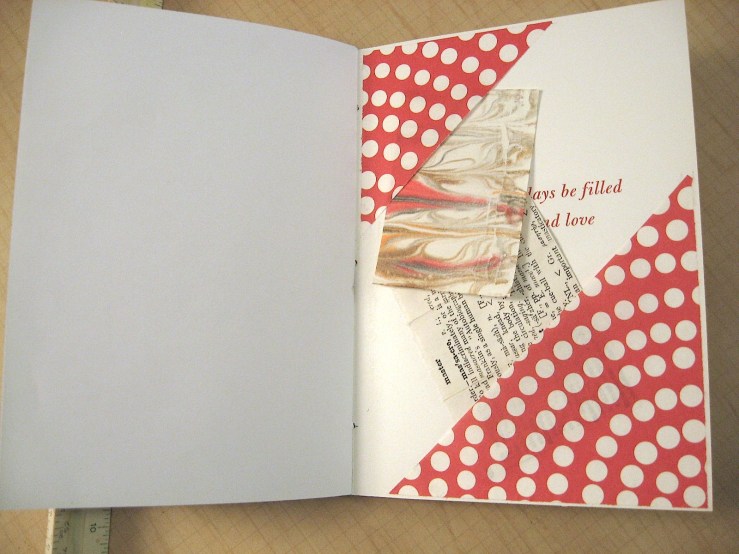
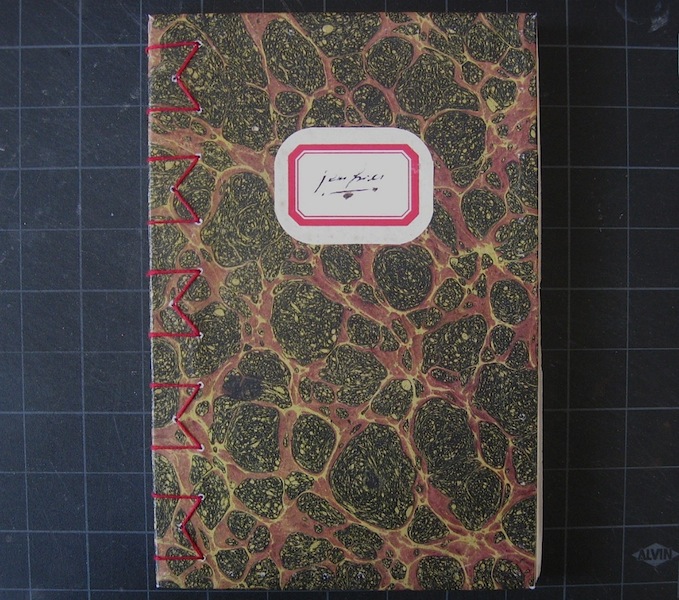
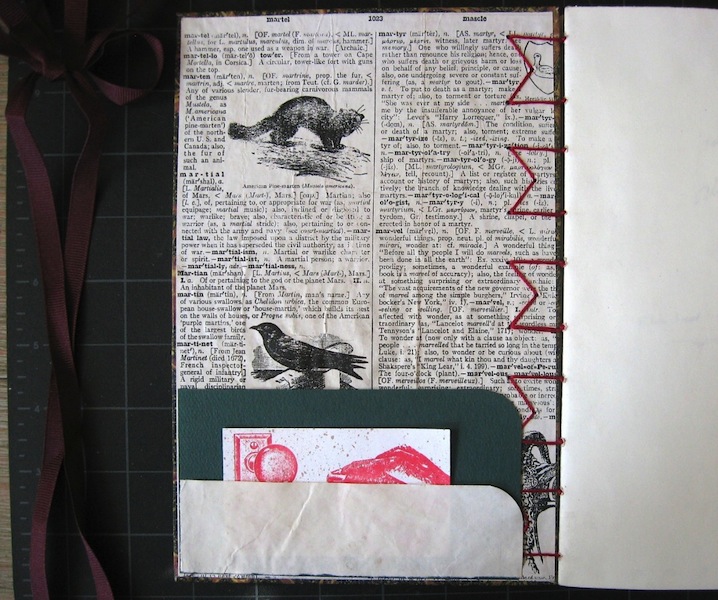
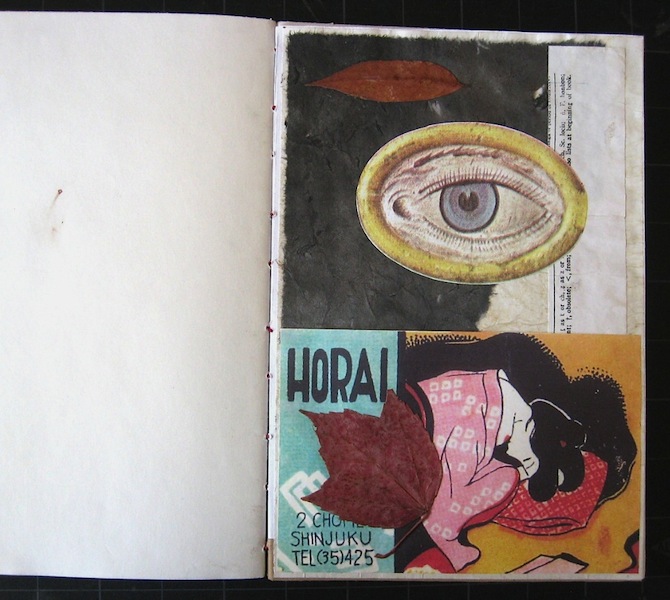
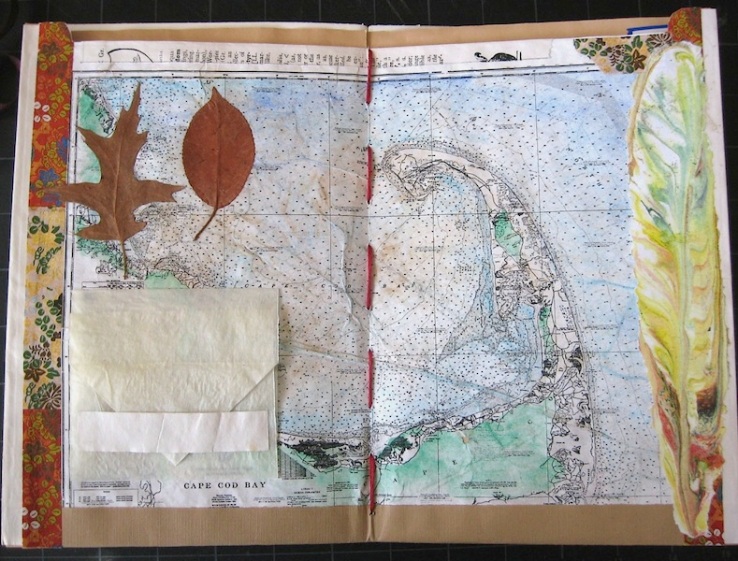
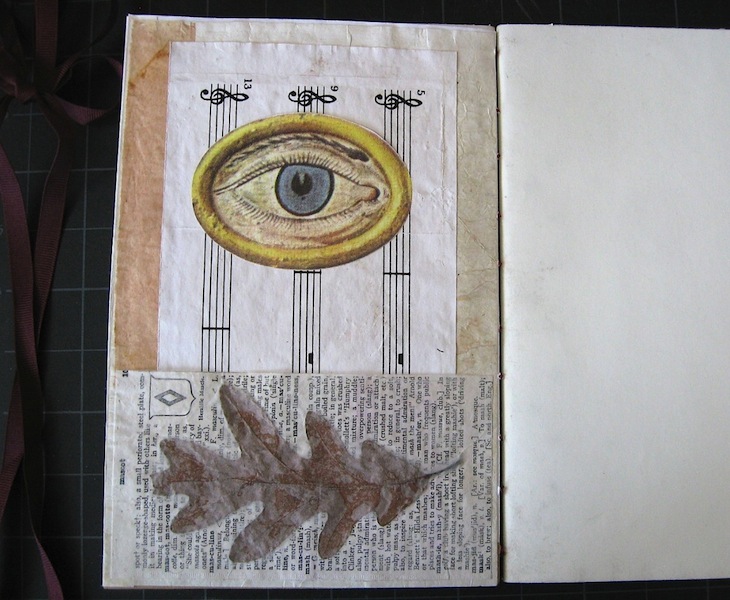
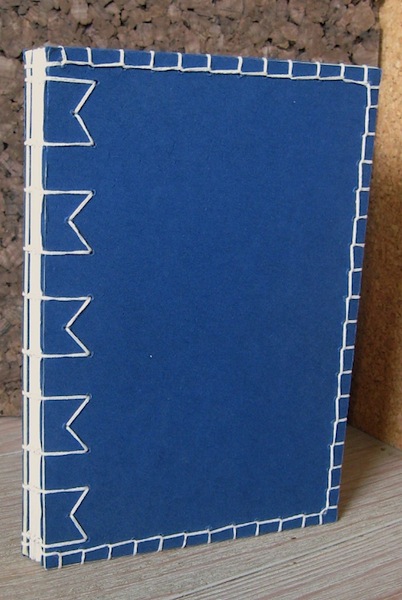
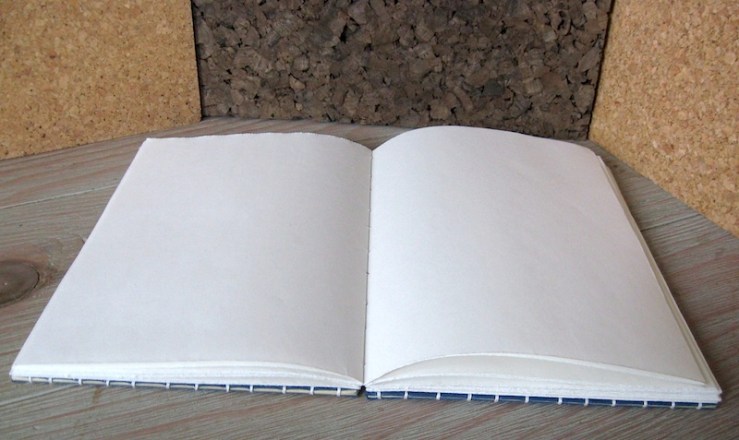
I finished rebuilding my blue sketchbook into an autumn book for sketching, journaling, and collecting field specimens, all the leaves, twigs, feathers, etc., I tend to pick up. I was inspired by the “junk journal” phenomenon, which is a great way to find beauty and function out of detritus. Even these gussied-up pocket inserts are part of my sketchbook practice, as I used them to work out experiments in paper building and collaging with natural botanicals. The binding is my favorite tetsuyoso style. Superficially, it resembles Coptic stitch, but this is in fact a very old binding from Japan. It lacks the external knots of Coptic, maintains neater tension with less fuss, and is flexible and resilient. Traditionally, the covers would be pasted on, but I adapted the Coptic method of sewing the covers on for a totally adhesive-free binding.
It might seem a little odd to make such a fancy thing just to sketch and brainstorm in, but kind of the point of being an artist is to get our thoughts outside of our heads, to make everything be an expression of how we see the world, to unify the inside and outside realities. So I think the book where I work out the kinks in my creativity should be a product of my creativity. This is what I came up with.
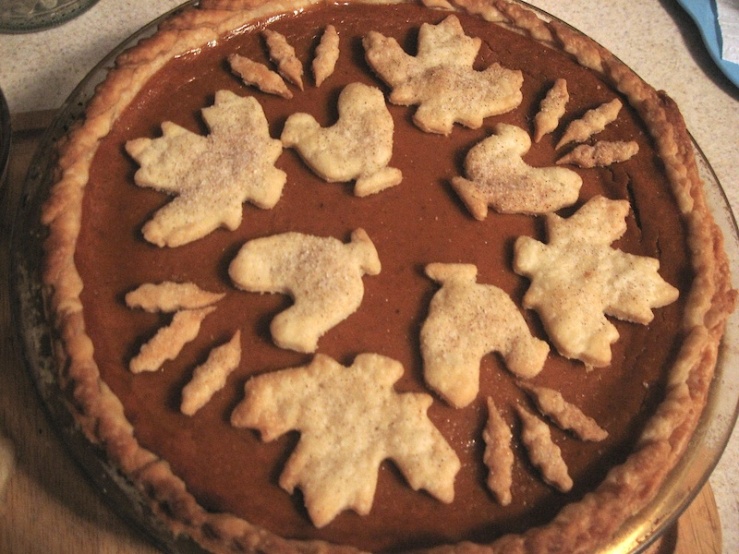
And I made the pie this year. It came out fancy, too. 😉
Happy holiday, all. Enjoy. Relax. Express yourself.
As mentioned in my last entry, I was sick through much of October and had just over one week to try to complete four weeks of projects. I did better than I thought I would, and I’ve decided to cheat slightly by extending the spooky season to the end of this weekend, to finish a few things and tie off those loose ends.
Completed in October proper, two zine-type books:
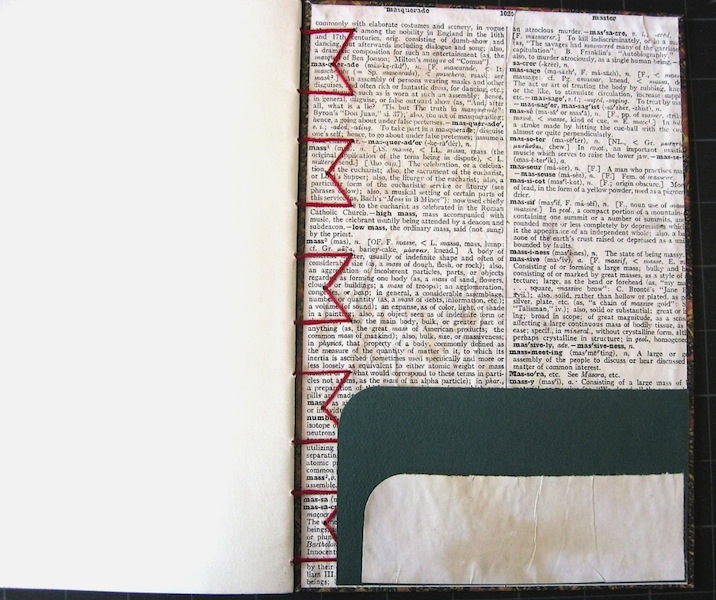
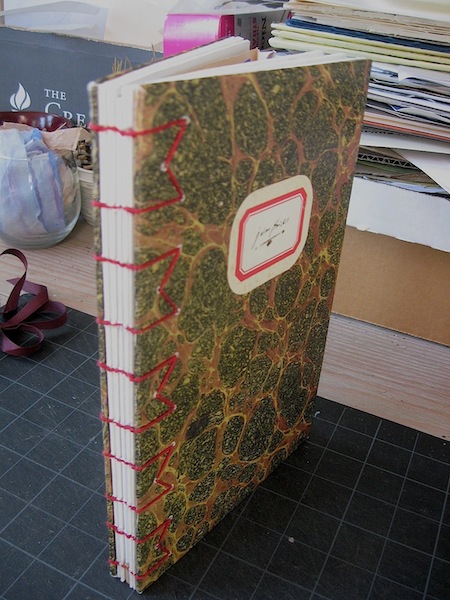
– “Masquerade,” featured last week, a book about masks, disguises, and false fronts. The hand-typed text is taken from dictionary clippings and famous quotes, and the illustrations are paper collage.
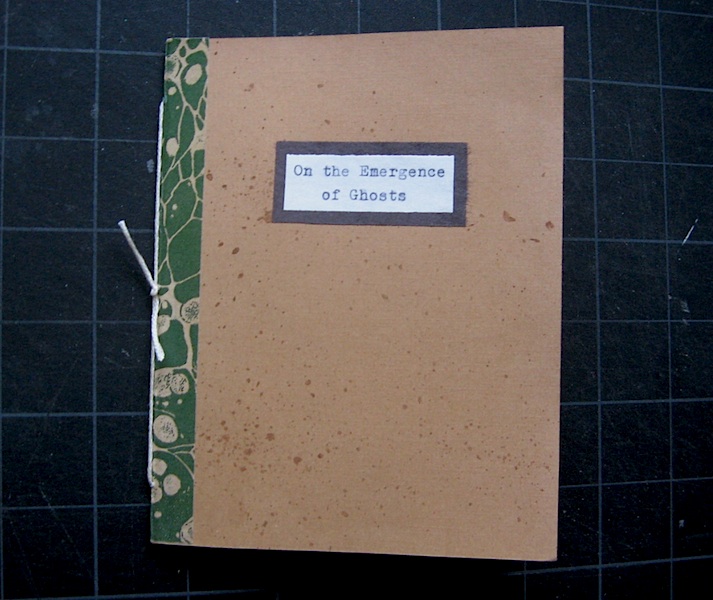
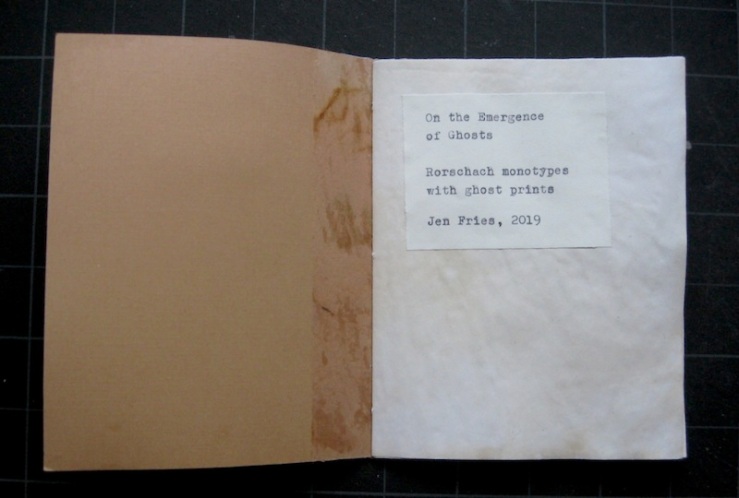
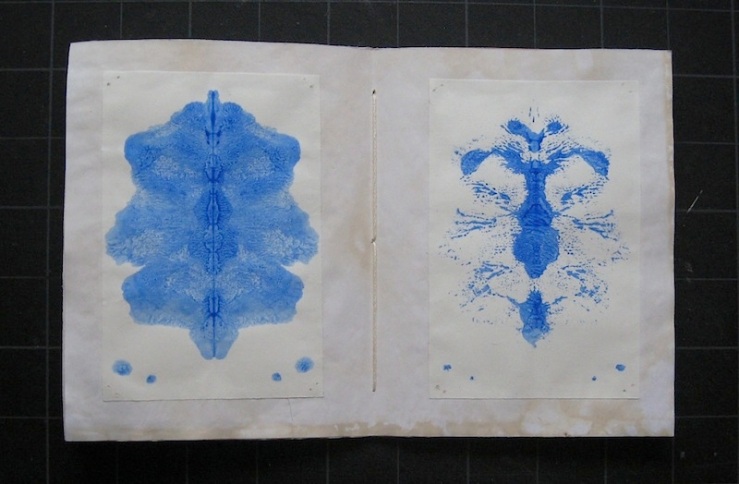
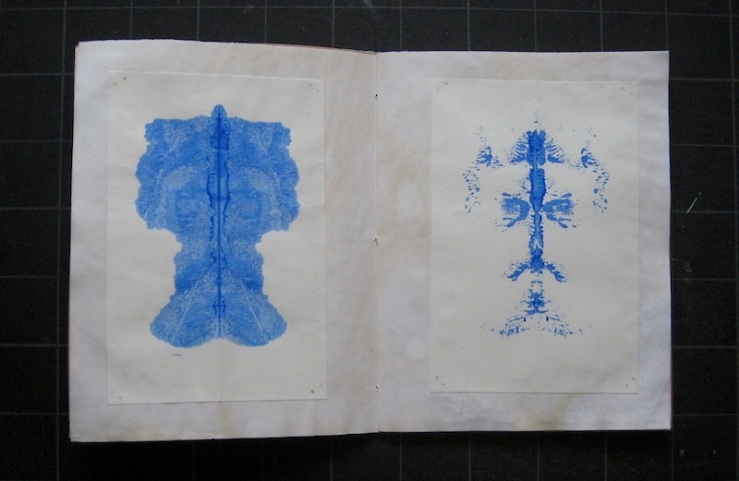
– “On the Emergence of Ghosts,” a mini collection of monotype prints. These are some of my favorites from a recent printmaking session. I first made the Rorschach-like blot prints with ultramarine blue acrylic paint on sketch paper. Then, before the paint was fully dry, I took a ghost print from the blot by laying over another piece of paper and folding and pressing it again.
Still progress from October:
– “Cemetery Dance,” a zine on a memento mori theme with quotes from Shakespeare.
– Mini mask cards, just some small toys.
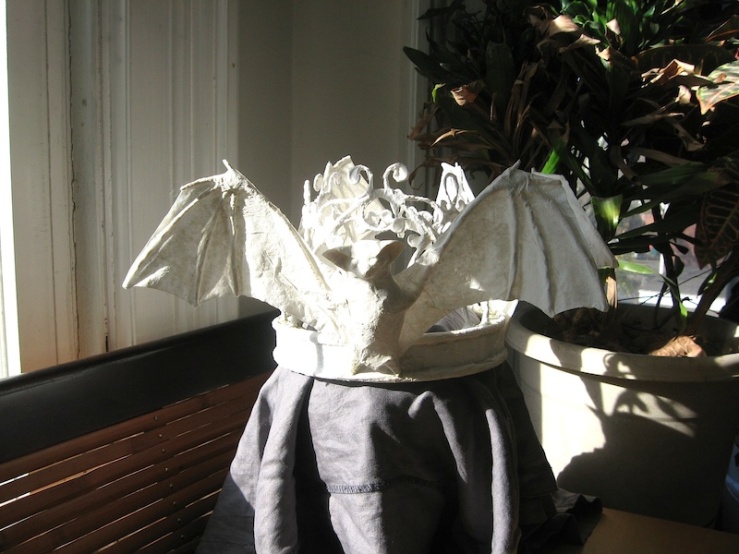
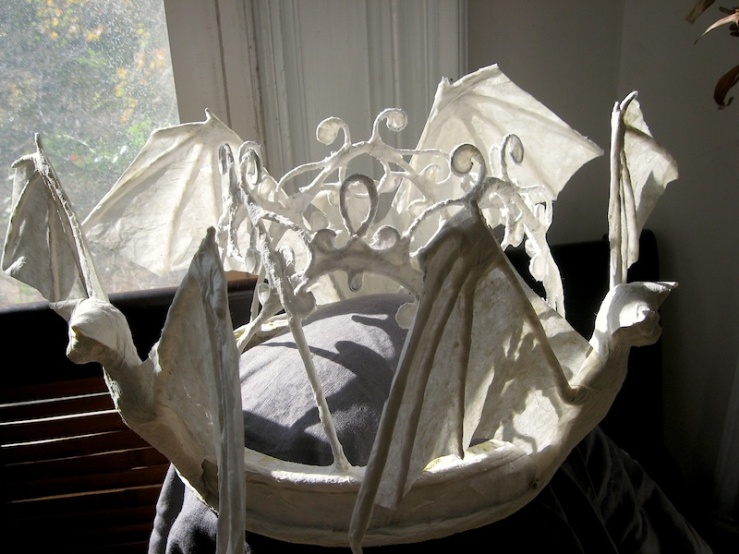
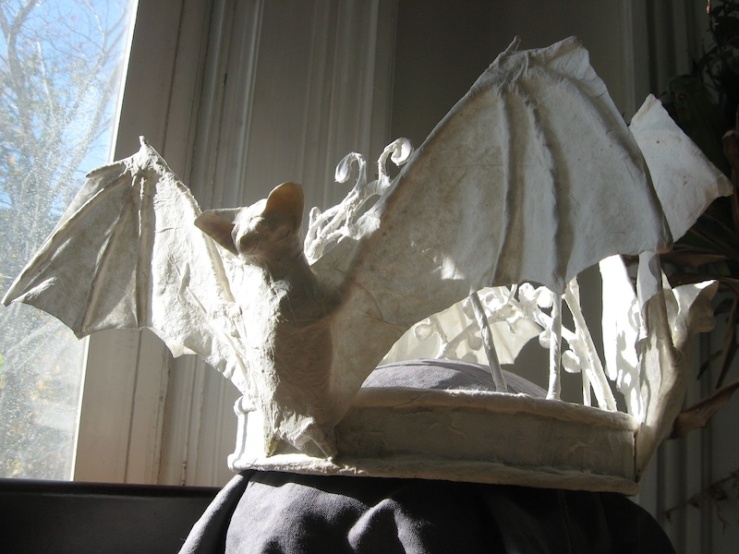
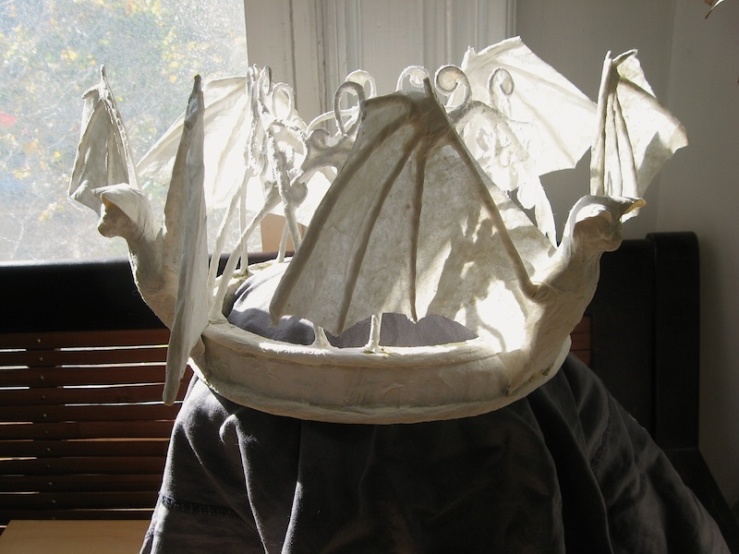
– Die Fledermaus Crown, a piece of wearable art. This was my big project for the month, and I’m amazed I was able to get it about 80% done in a week. I wanted something wearable for Halloween, but I’ve been a little off masks; I need to think about them some more. Then the words “bat” and “crown” popped into my head. The first-draft idea was Dracula-esque, then it evolved into a kind of naturalist ode to bats, but you know what? It’s a bat crown. It’s neither possible nor appropriate for such a thing to be dark or quiet or serious. So it ended up inspired by the frilly, fizzy, champagne-popping operetta Die Fledermaus by Johann Strauss, the Viennese Waltz King. I figure it will be just as appropriate for New Year, which is when most opera companies perform Die Fledermaus. Maybe I’ll do a series of opera crowns. The Magic Flute is starting to suggest itself.
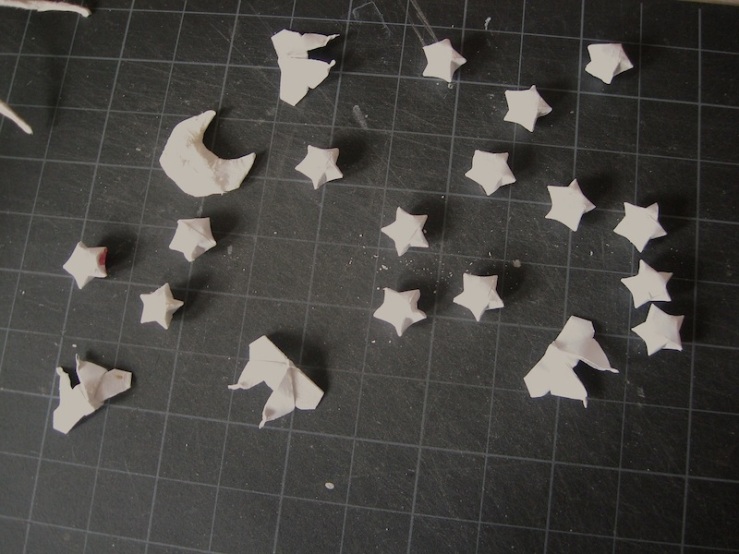
In any event, the crown still needs a little construction. The stars, moon, and moths need to be added. And it needs color because, yes, it’s going to be in color. But I decided it looks mad enough to share.
If I can finish these by end of Sunday, I will call October a technical success and take a few days off.
Die Fledermaus Crown in progress
On the Emergence of Ghosts
And also…
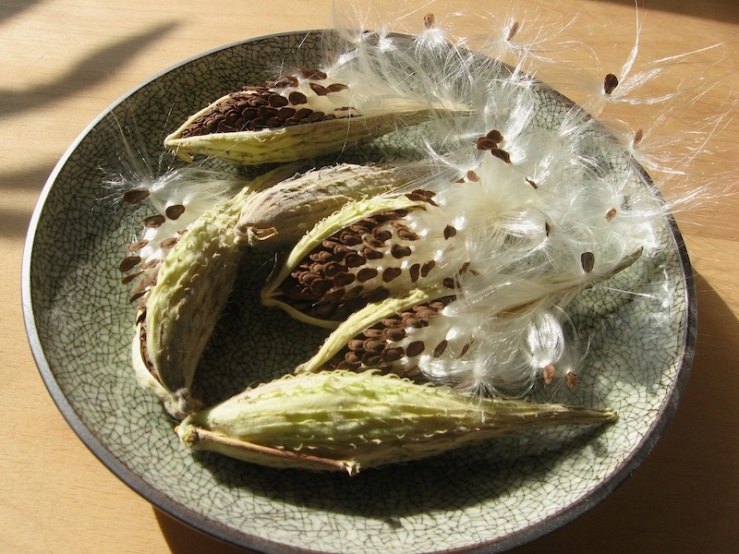
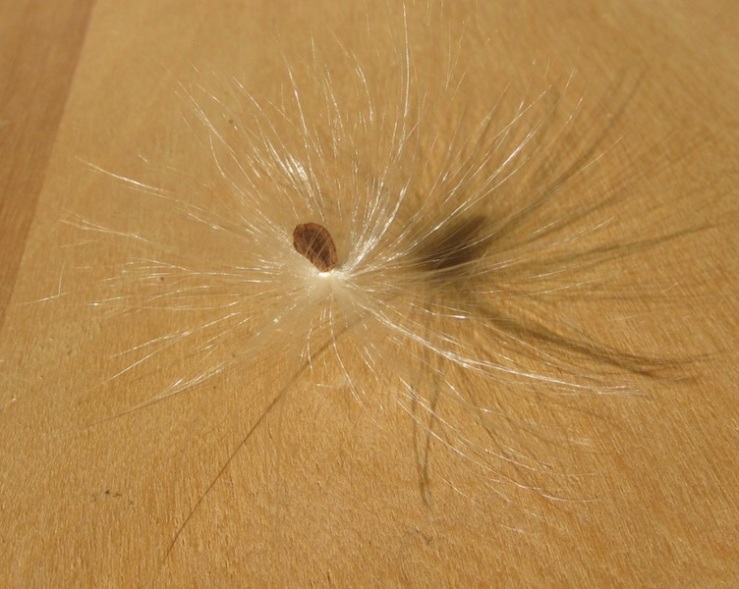
Milkweed pods from the garden
A stormy day over the Tobin Bridge, with cormorant in foreground
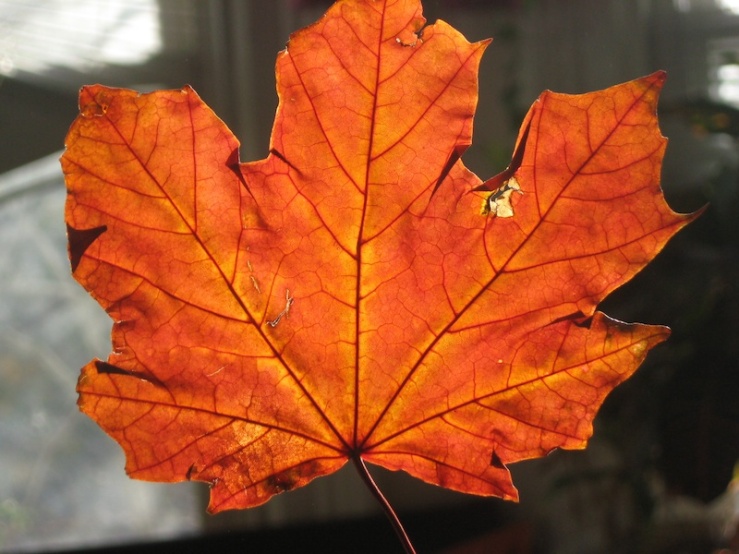
Sunlight through a maple leaf
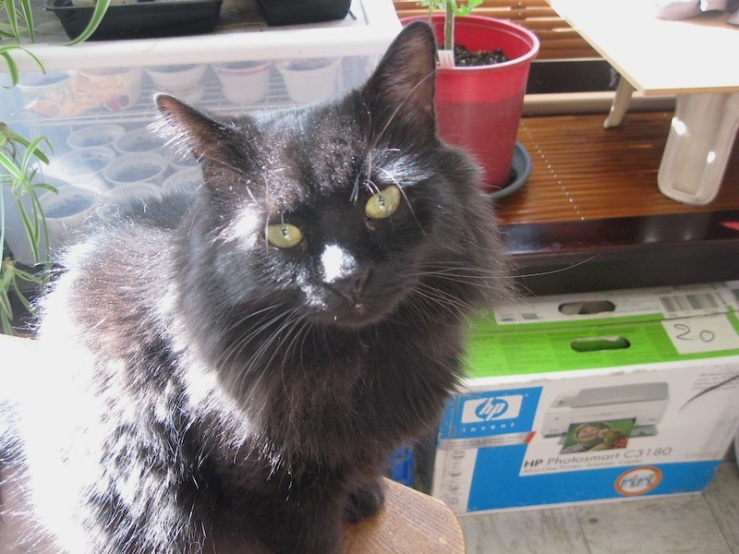
The same sunlight on a little black cat, Junior Studio Assistant, Scipio
We at the home attached to the studio have been sick as dogs since the middle of September, which is why I fell off the planet for a few weeks. But we are on the mend at last, and I’m racing to complete as many of my October projects as I can in these last few days of the month while still having fun.
First thing done: A zine titled “Masquerade.” It’s a little book of collages on the theme of disguise and falseness, social status and self-deception. It was inspired by Halloween, but of course, I took it in a weird, cynical, critical direction because that’s what I do. 😉 Soon, I’ll post information about hand-bound facsimile prints of this book, so please keep an eye out for that. Send a message via the Contact form or this site’s new Facebook page if you’d like to be notified when it is available.
I also attempted my first-ever video of a flip-through of the zine. Yes, it’s true, I have never tried to video anything before. I don’t know why. The video came out well, but the audio has an annoying buzz. Quick research suggests it’s probably something called a “ground loop,” having to do with the power adapter. I’ll have to solve that somehow without buying new equipment, such as a microphone like everyone else in the world uses.
Next, I’m cranking through to try to finish a wearable art object. It has bats on it! I don’t usually do wearable stuff, but sometimes you just have put on a bat. We love bats. This is Bat Week, though my wearable thing will be finished late because I didn’t know until this morning that this is Bat Week, and it’s already Friday.
I might not have time to finish the magic and reality essay book, but I’ll give it the old college try. Same with a zine about ghosts and an October-themed journal I’d very much like to make just for love. And I’ve been marbling and aging paper like a mad thing. All of this was supposed to be done over four weeks, but due to the aforementioned sick-as-a-dog-ness, I’ve had about one week of actual work so far.
In other areas of life, I have resurrected my vintage Olympia manual typewriter. Poor old girl needs a spa day, but I am so happy to be able to clack away noisily with her again. Most of the text in the “Masquerade” zine was made with her, and I can now print my fifty-word stories the way I want them to look.
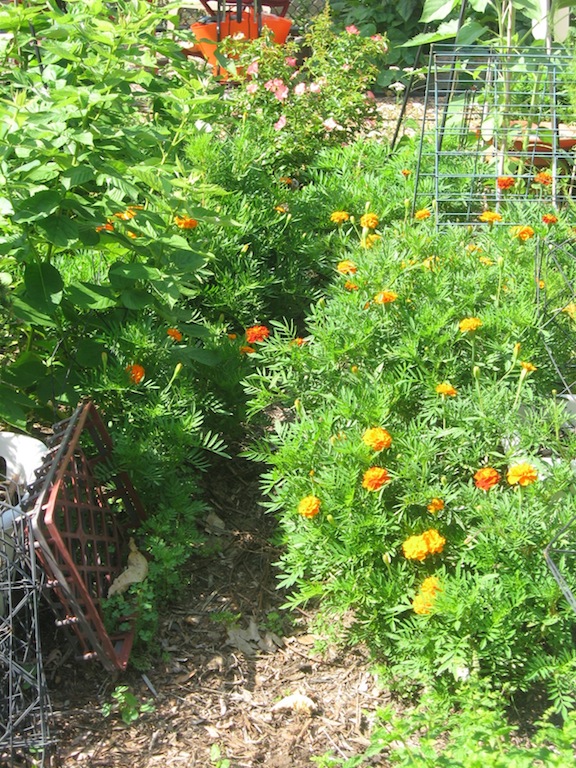
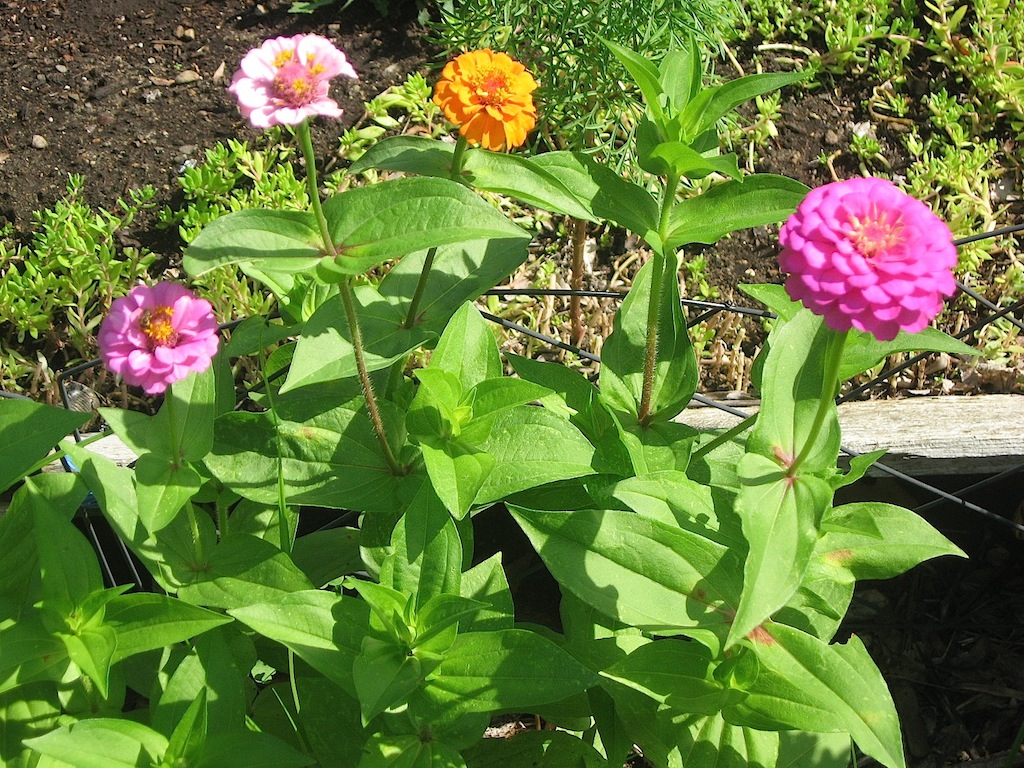
The gardening season is winding down, but the raspberries aren’t quite done, and the sunflowers, zinnias and marigolds are nowhere near done. Bees and butterflies are still visiting so I won’t be clearing out anything for a bit yet.
Oh, and as mentioned above, I created a Facebook page for this site. Yes, it is the Evil Empire, and I have a dysfunctional relationship with social media, ranging from none to hostile. But needs must, and this is the 21st century, and if you can’t beat them, join them, and you can’t sabotage – um, I mean win – the game if you don’t play, so I have a page. If you Facebook, please join, follow, like, whatever it is people do, and drop me a message or a comment, ask a question, whatever you wish. I check the page just about every day, and will gladly respond in a reasonable time frame – health, work, and fate permitting. Click the button below to visit.
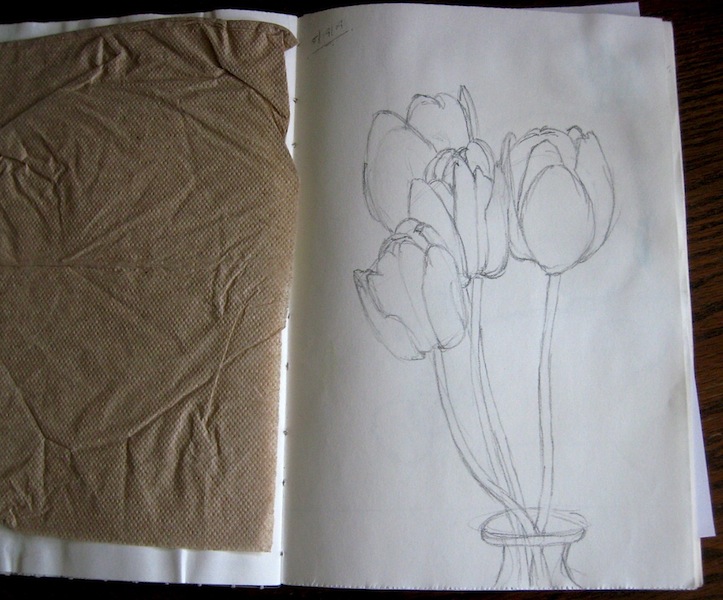
Working on the words aspects of a couple of projects, which is not very visual as processes go, so I thought this week I’d share a glimpse into my sketchbook.
I’m training myself to do more drawing. My poor book – I made it at New Year’s, for encouragement, using a variation on the Japanese tetsuyoso binding – and now it’s being filled with mad randomness. I think I have too much on my mind.
Book Nerdery: This binding was a bit of an experiment, combining coptic and tetsuyoso techniques. With the tetsuyoso binding, covers are usually glued on, but to make the book with no adhesives at all, I adapted the Coptic binding method of attaching covers. I like the way it worked.
The tetsuyoso binding lies flat effortlessly.
Tulips in a vase. My first attempt in years to render flowers realistically. Pencil.
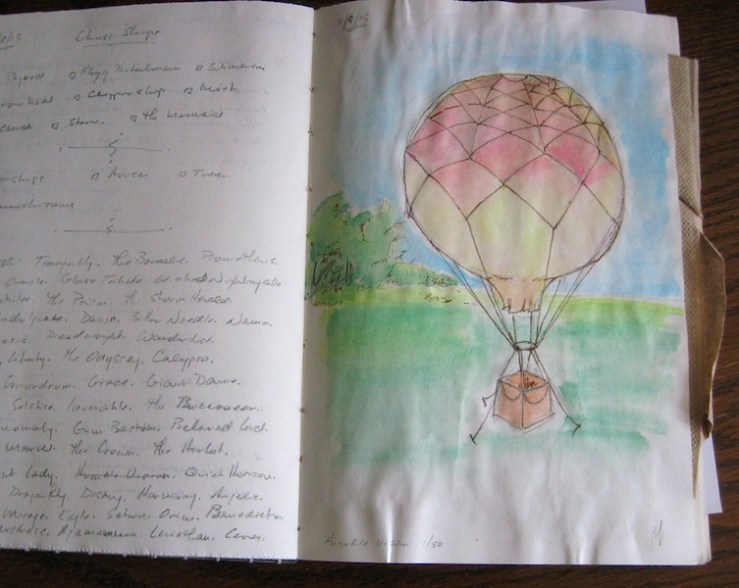
It is Balloon! I have no idea why I decided to draw a hot-air balloon from imagination, but I do rather like the effect of the trees in the background. As you can see, I write in my sketchbook as much as draw. Pencil sketch with watercolor and ink.
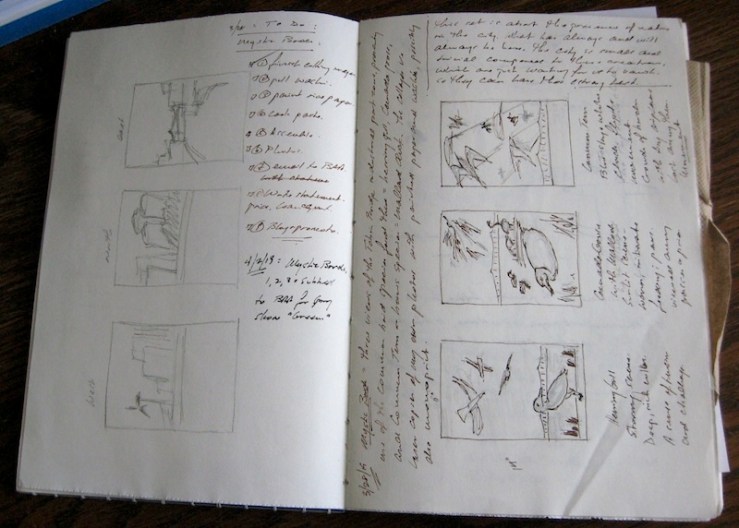
Initial design sketches and notes for the first three Estuary Birds, Mystic River project.
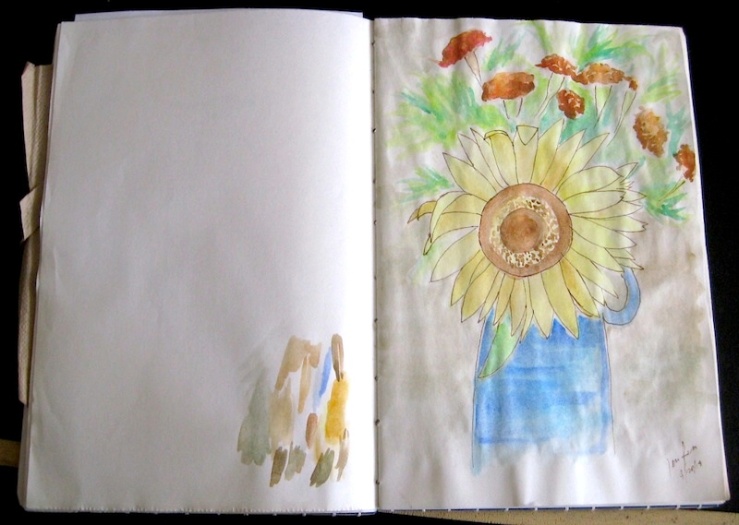
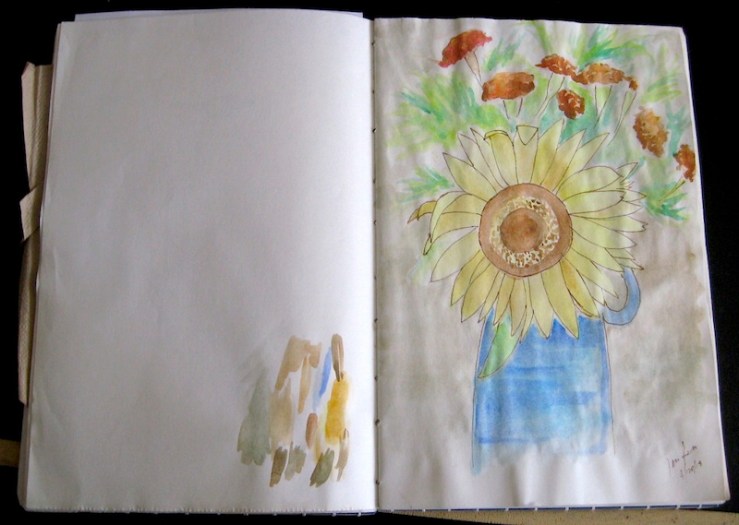
Sunflower and brown marigolds in a blue jug on my desk. The more I look at it, the more I like the marigolds. Watercolor and ink.
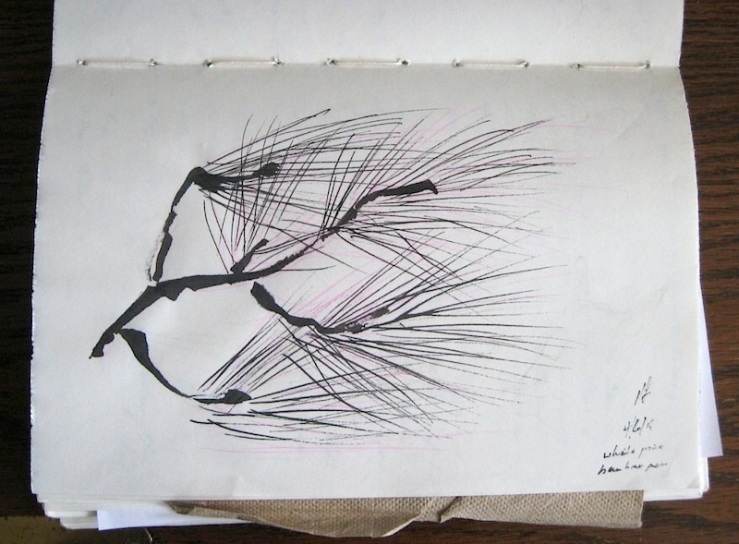
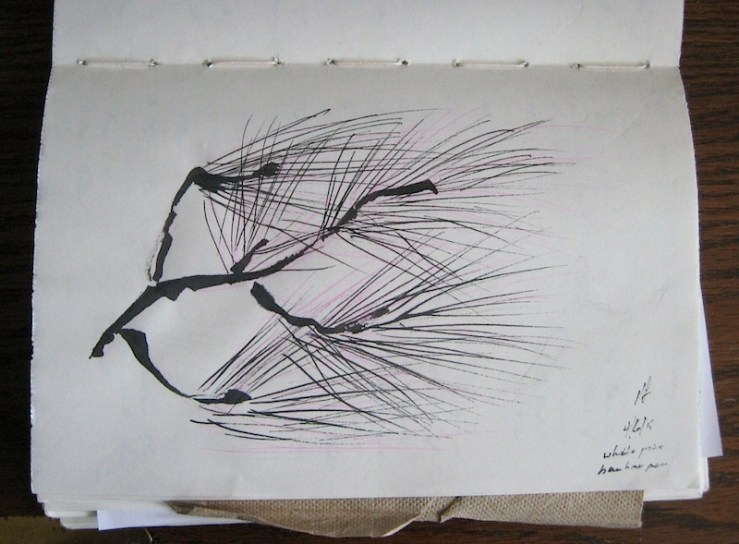
A white pine bough. My first attempt with a bamboo pen, just trying to get the feel of the tool. It might be my favorite sketch of the year. I should do more like this. India ink with bamboo pen.